When I first started experimenting with outdoor garden lighting, I quickly realized how much more it is than just sticking a few solar lamps into the ground. It’s about creating atmosphere — highlighting textures, improving safety, and extending the use of outdoor spaces well after sunset. Before you start buying fixtures, it’s important to understand the key principles that make lighting design both beautiful and functional.
Goals: safety, ambiance, accents
Think about why you want lighting. Pathway lights and step lights enhance safety, preventing tripping hazards. Accent lights highlight trees, sculptures, or architectural features, while ambient lighting from string lights or wall sconces creates warmth and coziness. Balancing these goals ensures your garden looks intentional, not cluttered or harshly lit.
Fixture types: spot, path, wash, step, string
Each fixture type serves a specific purpose. Spotlights are used to draw attention to focal points like trees or statues. Path lights softly define walkways. Wall-wash lights spread a gentle glow over surfaces, while step lights are recessed to brighten stairs and decks. String or festoon lights add charm to patios and pergolas — perfect for social evenings outdoors.
(Tip: Avoid pointing spotlights directly upward into windows or eyes; this reduces glare and keeps the ambiance soft.)
Brightness & color temperature (lumens/K)
Brightness is measured in lumens. For subtle mood lighting, 100–300 lumens is ideal; for accenting features, 400–700 lumens often works better. Color temperature, measured in Kelvin (K), defines the warmth of light:
- 2700K–3000K: Warm white (inviting, cozy)
- 4000K: Neutral white (clean, balanced)
- 5000K+: Cool white (crisp, dramatic – use sparingly)
Beam angles, glare control & IP/weather ratings
Beam angles determine how wide or narrow the light spreads. Narrow beams highlight specific features, while wide beams are best for general illumination. Always check the IP rating — IP65 or higher ensures resistance to dust and rain. Choose fixtures made from weatherproof materials like stainless steel, copper, or powder-coated aluminum for long-term durability.
For a detailed guide on fixture durability and IP ratings, see The Lighting Association’s outdoor lighting standards.
When you understand these fundamentals, designing your lighting plan becomes much easier — and your results, far more rewarding.
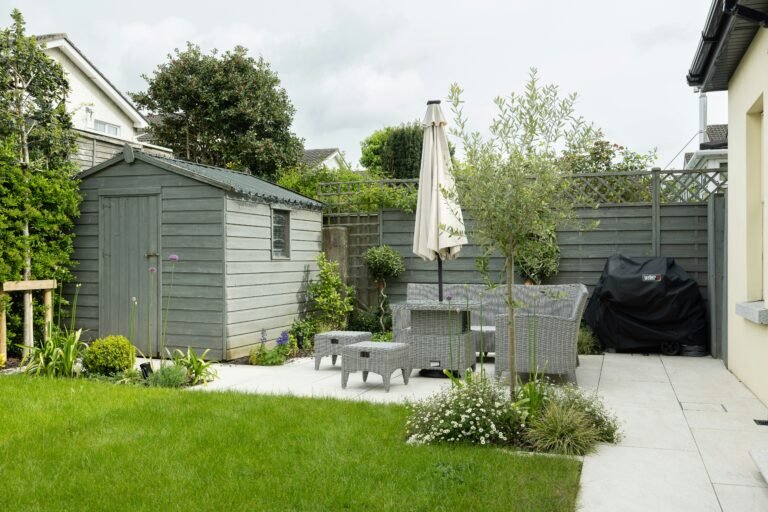
Outdoor Garden Lighting Ideas by Area
Designing a well-lit garden is like painting with light — you’re creating layers that bring texture, depth, and atmosphere to your landscape. When I plan outdoor lighting, I start by dividing the space into zones: paths, trees, borders, patios, and façades. Each area benefits from a specific lighting technique that balances beauty and function.
Paths & driveways (pathway lighting, bollards)
Pathway lighting guides guests safely while creating a welcoming rhythm through your garden. Low-level fixtures like bollards or mushroom lights spaced evenly (around every 2–3 meters) provide soft, overlapping pools of light. Avoid over-lighting — the goal is gentle guidance, not runway illumination. Solar pathway lights work well for smaller paths, though low-voltage landscape lighting provides more consistent brightness for longer drives or shaded areas.
Planning to redesign your walkways, too? Learn how to combine beauty and practicality in How to Design Beautiful and Functional Garden Pathways.
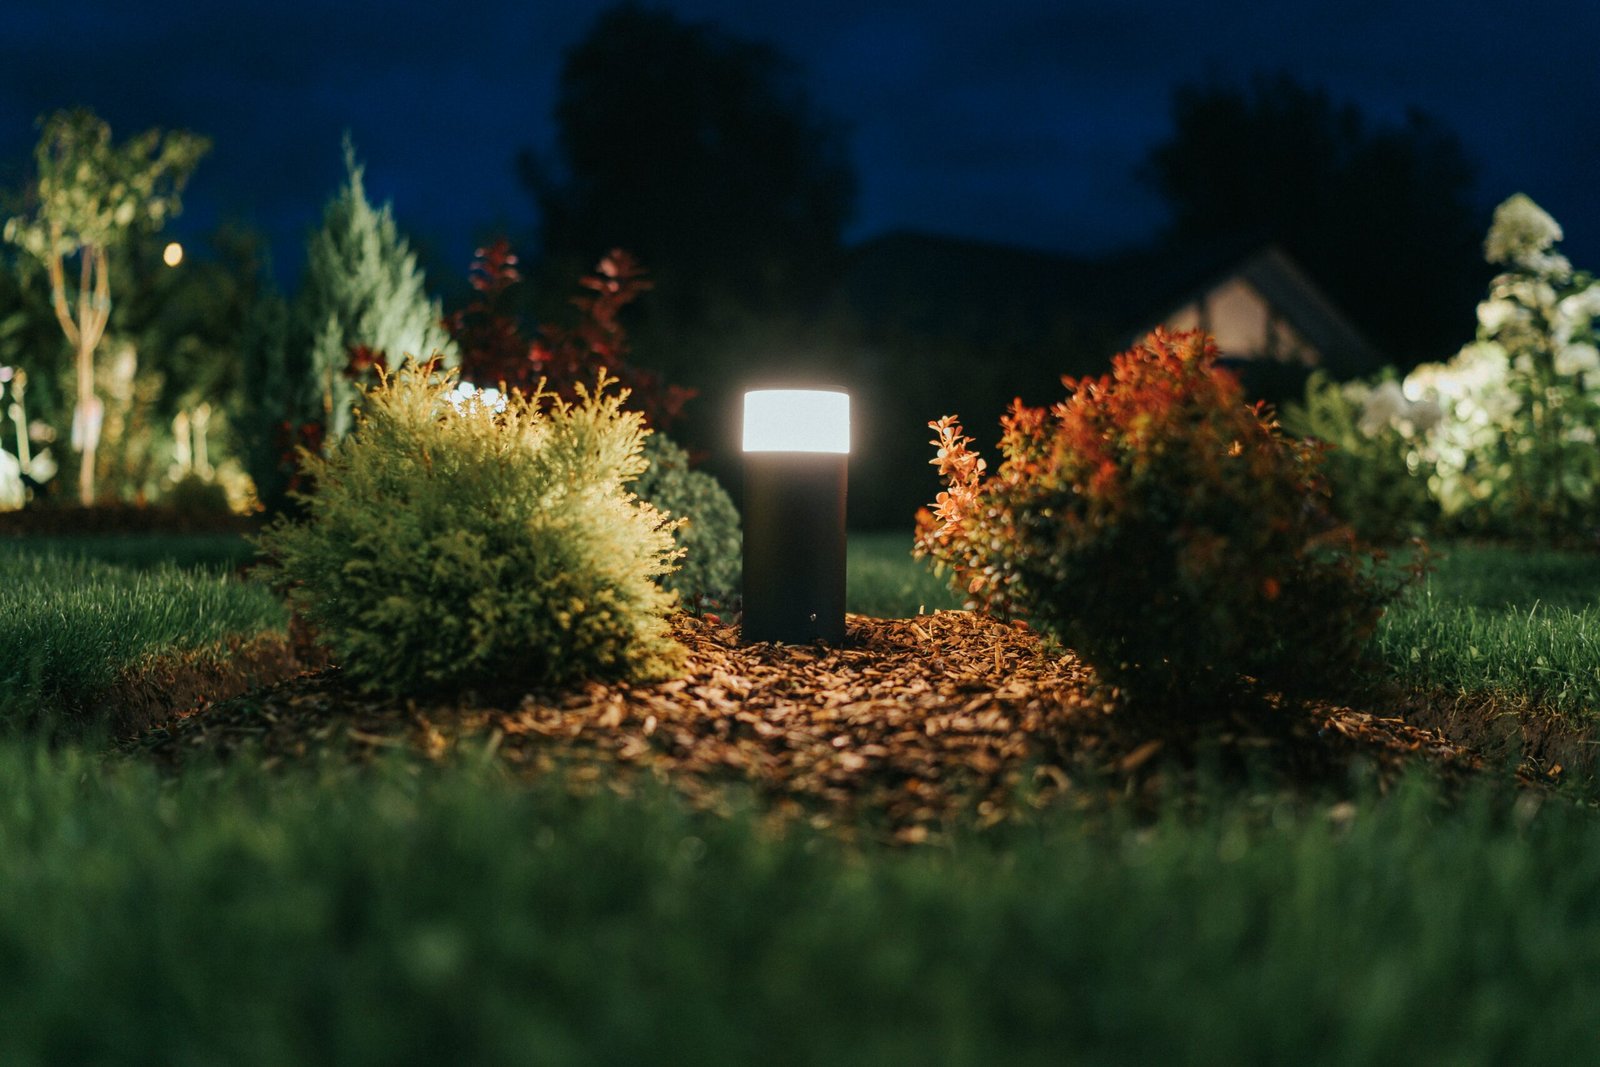
Trees & focal points (uplighting, moonlighting)
Uplighting from below dramatizes trunks and canopies, turning trees into sculptural art after dark. For a more natural look, try moonlighting — positioning lights high in the branches to cast soft, dappled shadows downward, simulating moonlight. It’s one of my favorite techniques because it feels effortless yet magical. Consider adjustable spotlights for flexibility as trees grow or change shape over seasons.
Beds & borders (wall-wash, stake lights)
To bring out the colors and textures of plants, use wall-wash or stake lights at low intensity. Aim the light at a 30–45° angle to avoid harsh shadows. Mixing warm and cool tones can add depth — for example, a warm 2700K glow on flowers combined with cooler 4000K on foliage creates a subtle contrast that feels natural and balanced.
Patios & decks (step lights, bistro/string)
Outdoor living spaces benefit most from layered lighting. Recessed step lights increase safety, while string lights or bistro bulbs overhead add a festive, intimate glow for gatherings. If you want flexibility, go for dimmable LED strings — they let you shift from bright dinner lighting to a soft after-hours mood with one click. (Check out Better Homes & Gardens’ patio lighting ideas for visual inspiration.)
Water features (submersible, reflections)
Lighting water brings life to the night. Submersible lights in ponds or fountains enhance movement and sparkle. If you prefer subtlety, aim spotlights across the surface instead of into the water — the reflections alone can double the effect.
Façade & entrances (grazing, downlighting)
Architectural lighting adds drama and sophistication. Grazing light positioned close to textured walls reveals stone or brick details beautifully. Downlighting from eaves or pergolas softens the approach to doorways and creates a welcoming entry. Choose fixtures with matching color temperatures to maintain consistency across your home’s exterior.
A helpful rule of thumb: light what you love and leave the rest in shadow. Contrast is what gives your garden nighttime personality.
Outdoor Garden Lighting Power & Control
No matter how beautiful your design, the right power source and controls are what make your outdoor garden lighting reliable, efficient, and enjoyable year-round. Choosing between solar, low-voltage, or smart lighting depends on how much brightness and control you need — and how much maintenance you’re willing to do.

Solar garden lights: pros, cons & best use cases
Solar lights are the easiest to install — no wiring, no digging, and zero energy bills. They’re ideal for accent lighting in sunny spots like garden borders or short pathways. However, I’ve learned that not all solar fixtures are equal. Look for models with:
- High-capacity lithium batteries (2000 mAh or more)
- Adjustable solar panels for maximum exposure
- Replaceable LEDs for longevity
Their biggest downside? Inconsistent brightness during cloudy or winter months. I use them for soft highlights but rely on wired options for main illumination. For an in-depth overview of quality ratings, the U.S. Department of Energy’s guide to solar lighting is worth reading.
Low-voltage landscape lighting: transformers, wiring, connectors
For reliable, professional-grade lighting, low-voltage landscape systems (12V) are unbeatable. They use a step-down transformer to convert your home’s 120V current into a safer, energy-efficient voltage.
Key setup tips:
- Choose a transformer rated 20–30% higher than your total wattage
- Use waterproof connectors and burial-rated cables
- Keep cable runs under 100 feet per line to prevent voltage drop
This setup provides consistent brightness and is easy to expand — I often start small and add fixtures over time as the garden evolves.
Smart controls: timers, sensors, app scenes
Smart lighting brings convenience and creativity. I recommend integrating timers and motion sensors for security or energy savings. Wi-Fi or Bluetooth-enabled controllers let you:
- Create “evening,” “party,” or “quiet night” scenes
- Sync lights with sunrise/sunset schedules
- Control brightness from your phone or voice assistant
Brands like Philips Hue and Ring now offer weatherproof outdoor ranges compatible with most smart home ecosystems.
Energy efficiency: LED choices & running costs
LEDs have transformed outdoor lighting efficiency. They consume up to 80% less energy than halogens and last up to 25,000 hours. Look for:
- Integrated LED fixtures (sealed, long-lasting)
- Replaceable LED bulbs (for easy upgrades)
- ENERGY STAR certification for reliability
While the upfront cost can be higher, I’ve found that LEDs pay for themselves within a year through reduced energy bills and minimal maintenance.
Smart, energy-efficient systems don’t just enhance your garden — they make it sustainable and cost-effective for the long run.
If you’re exploring other ways to make your outdoor space eco-friendly, discover water-smart landscaping in Xeriscaping Ideas: Low-Water Gardening Tips for Drought-Proof Yards.
Outdoor Garden Lighting Planning & Installation
A great lighting design starts on paper (or a simple sketch pad). I always tell homeowners: don’t buy a single fixture until you’ve mapped out where and why you need light. Planning helps you avoid clutter, wasted energy, and uneven illumination — all while keeping your landscape safe and cohesive.

Sketching a simple layout & spacing rules
Begin by drawing your garden or yard to scale. Mark key features like trees, patios, walkways, and water elements. Then note the lighting goals for each area — safety, accent, or ambiance.
Spacing is crucial:
- Path lights: every 2–3 meters (staggered, not in straight lines)
- Spotlights: 1–2 meters from the object, angled upward 30–45°
- Wall-wash lights: 60–90 cm from surfaces
This step ensures even coverage without over-lighting, which can flatten your garden’s texture at night.
Cable routing, voltage drop & safe connections
If you’re using low-voltage landscape lighting, plan your cable runs early. Keep cables close to borders or paths for easier maintenance and avoid running them under large roots or heavy walkways.
- Use 14–12 gauge wire for long runs to reduce voltage drop.
- Keep total load under 80% of your transformer’s capacity.
- Protect junctions with waterproof gel connectors or silicone caps.
I always recommend testing all connections before burying cables — it saves a lot of troubleshooting later.
Safety musts: GFCI outlets, IP ratings, local codes
Outdoor electrical work demands safety awareness. Use GFCI (ground-fault circuit interrupter) outlets to prevent shock hazards. Check that every fixture has an IP65 or higher rating for weather protection. If you’re unsure about local electrical regulations, it’s best to consult a licensed electrician — especially when connecting to mains power.
For reference, the National Electrical Code (NEC) outlines outdoor wiring standards that apply in most U.S. regions.
Maintenance: cleaning lenses, seasonal tweaks
Your garden changes through the seasons — and your lighting should adapt. Wipe lenses and housings every few months to remove dirt or insect buildup that dims light output. In spring or fall, recheck angles to ensure plants haven’t grown into beams or blocked fixtures. I often adjust my uplights yearly to highlight new growth or seasonal focal points like flowering trees.
Proper planning and upkeep don’t just extend fixture life — they ensure your outdoor lighting continues to tell the right visual story, year after year.
Budget & Mistakes to Avoid
One of the best parts about outdoor garden lighting is that it scales — you can start small and elegant, then build up to a fully layered landscape over time. The trick is to spend where impact is highest and avoid the classic errors that make even expensive systems look cheap.
Cost ranges: DIY vs. pro installs
Here’s a rough guide I use when planning budgets:
- Entry-level / solar setup: €50–€150 for basic path and accent lighting
- DIY low-voltage system: €200–€600 for transformer, cable, and 6–12 quality fixtures
- Pro-designed & installed: €800–€2,500+ depending on garden size, fixture quality, and controls
If your garden has complex terrain, tall trees, or you want architectural effects (grazing, moonlighting from high points), bringing in a landscape lighting specialist is often worth it. They’ll calculate voltage, beam angles, and fixture placement for you. For price comparisons and buyer guides, resources like Houzz outdoor lighting are handy for real-world setups.
Common pitfalls: overlighting, glare, mixed color temps
Even good fixtures can look bad if used incorrectly. Watch out for:
- Overlighting: Too many bright fixtures flatten the garden and ruin nighttime contrast. Light only what needs to be seen.
- Glare: Exposed bulbs shining into eyes or windows are uncomfortable — shield or angle them away.
- Mixed color temperatures: A 2700K path next to a 5000K façade looks disjointed. Stick to one temperature family outdoors (usually warm white).
- Unbalanced front vs. backyard lighting: If the front is elegant but the backyard is pitch black, the house feels visually unbalanced at night.
Quick checklist before you buy
- Do I have a sketch with lighting zones?
- Are all fixtures rated for outdoor/wet locations (IP65+)?
- Do I know my power source (solar, low-voltage, or mixed)?
- Are color temperatures consistent (2700–3000K for cozy, 4000K for modern)?
- Did I include at least 1–2 smart/timer controls?
- Is there room in the transformer capacity for future fixtures?
I’ve found that people who plan for expansion from day one end up with the most beautiful gardens — because lighting needs evolve as plants grow and outdoor living areas change.
Conclusion
When I first began experimenting with outdoor garden lighting, I underestimated how profoundly it could change the atmosphere of a space. The right balance of safety, mood, and artistry can make a garden feel like an entirely new world after dark — calm, elegant, and alive with texture.
The key takeaway is this: plan your lighting with intention. Don’t rush to fill every corner with brightness; instead, highlight what matters most — a winding path, a favorite tree, or the gentle shimmer of water. Thoughtful design, energy-efficient fixtures, and reliable controls ensure your lighting remains both beautiful and sustainable year after year.
If you’re new to this, start small: a few solar garden lights for your paths or a low-voltage landscape lighting kit for focal areas. As your confidence grows, integrate smart controls to fine-tune your settings and enhance security.
A well-lit garden isn’t just a design feature — it’s an experience.
Ready to begin? Explore HomelyHaven’s curated guides and product recommendations for outdoor lighting solutions that balance beauty, safety, and long-term value. With the right approach, your evenings outdoors will never look the same again.
Alex is the creator of Homely Haven, a space dedicated to simple, stylish ideas for interiors and gardens alike. With a passion for cozy living rooms, inviting outdoor spaces, and practical DIY solutions, Alex shares tips and guides that help turn any house into a true home.
From budget-friendly decorating hacks to weekend garden projects, the goal is always the same: to inspire you to create spaces that feel personal, beautiful, and welcoming. When not writing, Alex is usually rearranging furniture, sketching new garden layouts, or exploring design trends for the next project.