When I first heard about xeriscaping, I thought it meant giving up beauty for practicality — a yard of gravel and cacti that looked more like a parking lot than a garden. But after trying it myself, I quickly learned how wrong that stereotype is. Xeriscaping is a form of low-water gardening that focuses on smart design, resilient plants, and efficient water use. It’s about working with your environment, not against it.
Today, with droughts becoming more frequent and water bills rising, xeriscaping is one of the most rewarding changes homeowners can make. I’ve found that once established, a well-designed xeriscape needs minimal irrigation and almost no mowing — just a bit of thoughtful maintenance each season. Plus, it’s satisfying to know that your yard not only looks great but also supports sustainability and local ecology.
What “Low-Water Gardening” Really Means
Low-water gardening doesn’t mean no water — it means using it wisely. The goal is to minimize evaporation and runoff while helping plants thrive with natural rainfall whenever possible. That might involve water-wise plants, soil improvement, mulch layers, and a layout that groups plants by their water needs (known as hydrozoning).
Where Xeriscaping Shines
Xeriscaping is ideal for drought-prone regions and areas with watering restrictions, but it’s surprisingly versatile. Whether you live in a desert climate or a temperate zone, the same principles apply: conserve water, reduce maintenance, and design for local conditions. Municipalities in California, Texas, and Colorado even offer rebates and incentives for homeowners who replace turf with xeriscape-friendly landscapes.
Quick Wins You Can Start This Weekend
If you’re eager to dip your toes in, start small:
- Replace a strip of lawn with drought-tolerant perennials.
- Add mulch around existing shrubs to retain moisture.
- Adjust your irrigation timer to water less frequently but more deeply.
Over time, these small steps can evolve into a full xeriscape transformation — one that saves water, supports pollinators, and still feels like a lush, inviting space.
What Is Xeriscaping? Core Principles Explained
Before digging into design ideas or plant choices, it’s important to understand what xeriscaping really is — and what it isn’t. At its core, xeriscaping is a landscaping philosophy built around conserving water through thoughtful design, efficient irrigation, and resilient plant selection. It’s not about removing greenery; it’s about redefining beauty to fit local climates and resources.
When I started planning my first xeriscape, I discovered how structured and creative it can be. Done right, it results in a yard that’s colorful, low-maintenance, and environmentally responsible — without sacrificing comfort or style.
The Seven Pillars of Xeriscaping
Experts and agencies like the Colorado WaterWise Council outline seven essential principles of xeriscaping:
- Planning and design – Map sun exposure, slopes, and existing vegetation before you plant anything.
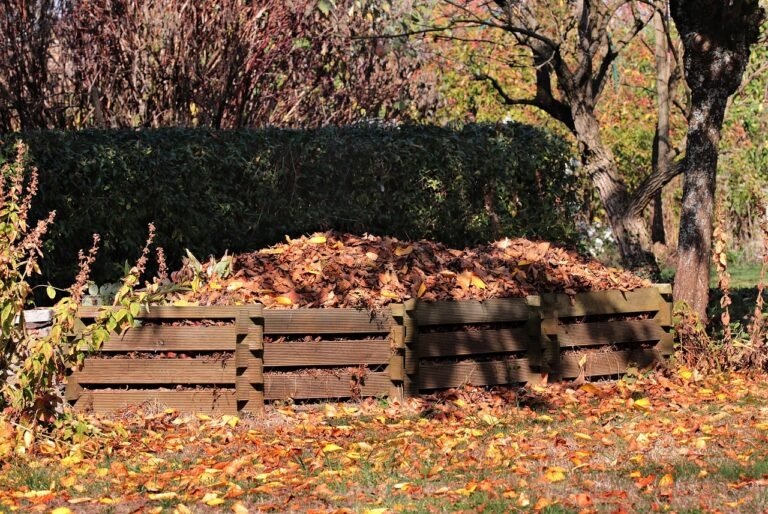
- Soil improvement – Enrich soil with compost or organic matter to boost water retention.
- Efficient irrigation – Use drip systems, timers, and sensors to deliver water where it’s needed.
- Appropriate plant selection – Focus on native or drought-tolerant species adapted to your climate.
- Practical turf areas – Limit grass to functional zones (play, pets, pathways).
- Mulching – Apply organic mulch to reduce evaporation and control weeds.
- Maintenance – Regularly check irrigation, prune, and refresh mulch to keep your xeriscape thriving.
Following these steps turns a garden into a self-sustaining ecosystem that supports local wildlife and reduces water waste.
Xeriscaping vs. “Zeroscaping”
A common misconception is that xeriscaping equals zeroscaping — a barren landscape of gravel and succulents. That couldn’t be further from the truth. Xeriscaping emphasizes living, dynamic environments using diverse plant textures and colors. “Zeroscaping,” on the other hand, strips away vegetation almost entirely, which can cause heat buildup and poor soil health. A balanced xeriscape keeps your space green, welcoming, and ecologically stable.
Common Myths (and What the Research Actually Says)
- Myth: Xeriscaping is only for deserts.
Truth: Even humid regions benefit from reduced irrigation and climate-appropriate planting. - Myth: It’s expensive to install.
Truth: Initial costs vary, but water and maintenance savings quickly offset them. - Myth: Xeriscaping looks dull.
Truth: With the right mix of water-wise plants and creative design, xeriscapes can be vibrant year-round.
In short, xeriscaping blends efficiency, beauty, and ecological mindfulness — proving that sustainability doesn’t mean compromise.
Planning Your Xeriscape: Site, Sun & Soil
Before you plant a single shrub or lay down mulch, take time to analyze your yard. Planning is the backbone of successful xeriscaping. A bit of early observation saves hours of correction later — and ensures your low-water garden thrives naturally rather than struggling against its environment.
When I designed my first xeriscape, I spent a week just studying my yard at different times of day: where the sun hit hardest, how water drained after rain, and where shade lingered. That knowledge shaped every decision that followed.
Reading Your Lot: Microclimates, Wind, and Runoff
Every property has microclimates — small zones with unique conditions. South-facing slopes, for instance, get more sun and heat, perfect for drought-tolerant landscaping with hardy succulents or ornamental grasses. North-facing areas or shaded corners stay cooler and moister, making them better for partial-sun plants.
Wind exposure also matters. Strong winds dry out soil faster, so using fences, hedges, or boulders as windbreaks can protect delicate plants and reduce water loss. When it rains, watch where water pools or drains quickly. That tells you where to install water-wise plants that match those moisture levels.
Simple Soil Tests & How to Improve Water Retention
Healthy soil is the foundation of any low-water garden. A quick way to understand yours:
- Jar test: Fill a jar with soil and water, shake, then let it settle. The layers (sand, silt, clay) reveal your soil type.
- Drainage test: Dig a hole, fill it with water, and see how fast it drains. Too fast = sandy; too slow = clay-heavy.
If your soil drains poorly, add compost or organic matter. These amendments help retain moisture and create an ideal environment for xeriscape design plants to establish deep, drought-resistant roots. Avoid using synthetic fertilizers — they encourage shallow growth and frequent watering.
Creating Hydrozones to Match Plant Water Needs
This is one of xeriscaping’s smartest principles. Hydrozoning means grouping plants by their water requirements:
- High-use zones: Near patios or entrances, where frequent watering is acceptable.
- Moderate-use zones: Contain hardy ornamentals that need watering only during long dry spells.
- Low-use zones: Outlying areas with tough, native plants that rely almost entirely on rainfall.
By structuring your landscape this way, you ensure every drop of water serves a purpose — not a patch of thirsty turf in the corner.
With the right site assessment and soil preparation, your xeriscape will practically take care of itself — thriving through heatwaves while staying effortlessly elegant.
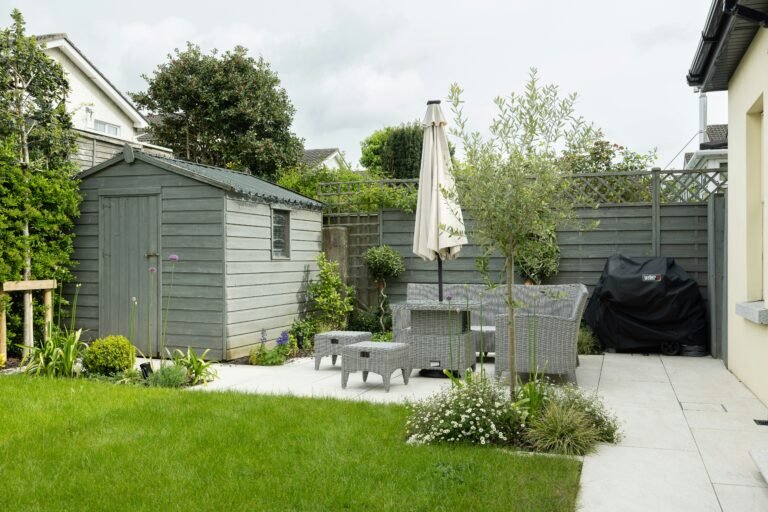
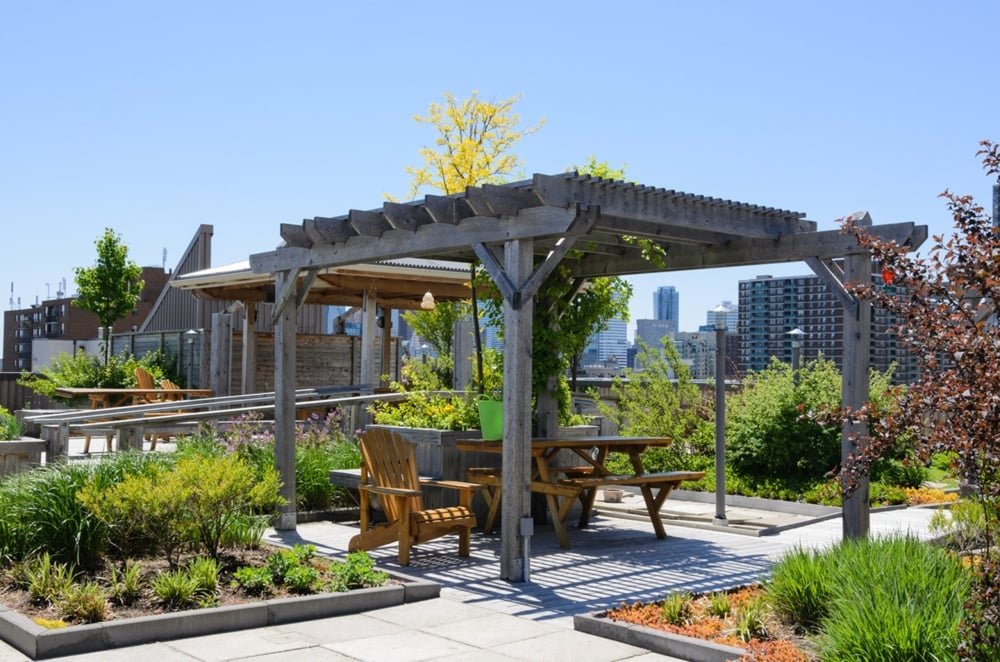
Xeriscaping Ideas for Beautiful Curb Appeal
One of the most common misconceptions about xeriscaping is that it sacrifices visual appeal for practicality. In reality, xeriscapes can be some of the most striking and creative gardens around. With the right mix of textures, colors, and materials, your yard can look both stylish and sustainable — a showpiece that also saves water.
When I redesigned my front yard, I wanted it to make a statement without feeling forced. I learned that the key was balancing structure, color, and low-water plant variety to make every inch feel intentional.
Foundation Beds, Pathways, and Entry Focal Points
Start with the framework of your yard. Use curved, flowing lines instead of rigid ones — they mimic natural landscapes and create a feeling of movement. Consider:
- Rock borders or dry creek beds to guide rainwater runoff.
- Flagstone or decomposed granite paths to replace thirsty lawns.
- Boulders and raised planters as focal points that add depth.
At your entryway, mix small drought-tolerant shrubs (like lavender, rosemary, or boxwood) with ornamental grasses for contrast. Framing your front door with greenery softens the architecture while keeping maintenance minimal.
Color Schemes and Seasonal Interest with Low-Water Plants
A xeriscape doesn’t have to be monotone. Combine plant textures and colors that change with the seasons:
- Spring: Penstemon, salvia, and California poppy for vivid blooms.
- Summer: Agastache, yarrow, and Russian sage thrive in heat.
- Fall: Red yucca and ornamental grasses add warm tones.
- Winter: Evergreens like juniper or manzanita maintain structure.
Using water-wise plants that flower at different times of year ensures your yard stays lively and inviting. Pair fine-textured plants (grasses) with broad-leafed ones (succulents or shrubs) for visual balance.
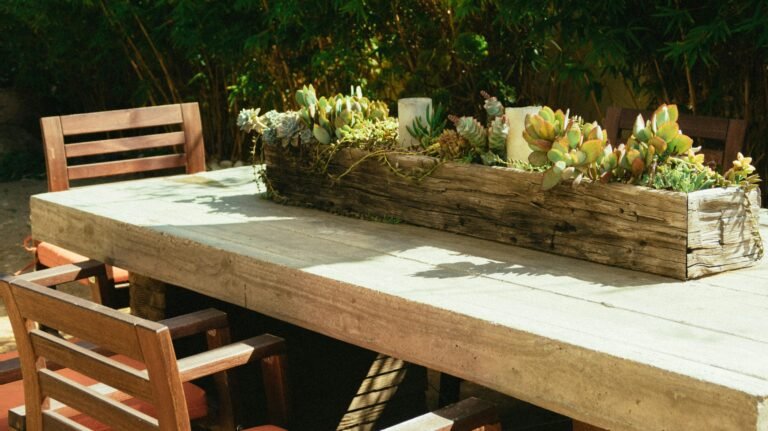
Using Containers and Raised Mounds for Depth
Containers are perfect for adding height, variety, and mobility. Terra-cotta or concrete pots complement a xeric palette and help define outdoor living zones. Choose porous containers that allow for proper drainage and fill them with low-water perennials like sedum, lantana, or dwarf agave.
If you’re working on a sloped site, raised mounds (or berms) are another clever trick. They improve drainage and give the illusion of rolling terrain — echoing natural desert or Mediterranean landscapes.
By thoughtfully blending form and function, you can create a front yard that’s both eco-friendly and eye-catching, proving that sustainability can absolutely be beautiful.
Water-Wise Plants: Region-Smart Selections
Choosing the right water-wise plants is where xeriscaping truly comes alive. These are the living components that define your yard’s color, texture, and mood — and when chosen wisely, they thrive on minimal water once established. The goal isn’t to copy a desert, but to curate a palette of resilient plants suited to your region’s unique climate.
When I first switched to xeriscaping, I learned that the best results came from observing what already flourished locally — often plants I’d overlooked because they weren’t “showy” in a traditional sense. Many turned out to be hardy, low-maintenance, and surprisingly vibrant when grouped creatively.
Natives vs. Well-Adapted Non-Natives
Native plants are always the most reliable starting point. They’re evolved for local rainfall patterns, soil conditions, and pests. For example:
- Southwest U.S.: Desert willow (Chilopsis linearis), agave, red yucca.
- Pacific Northwest: Oregon grape (Mahonia aquifolium), yarrow, sedum.
- Southeast: Coreopsis, muhly grass, black-eyed Susan.
However, well-adapted non-native plants like rosemary, lavender, or lantana often blend beautifully with natives while offering longer bloom seasons. The trick is to ensure they’re not invasive and that their water needs match your hydrozones.
Drought-Tolerant Trees, Shrubs, Perennials & Grasses
Building a balanced xeriscape means layering plant heights and textures. Here’s a simple structure to follow:
- Trees: Palo verde, mesquite, olive, or crape myrtle (for shade and structure).
- Shrubs: Texas sage, rockrose, juniper, or butterfly bush.
- Perennials: Salvia, echinacea, blanket flower, and gaura for lasting color.
- Grasses: Blue fescue, fountain grass, or feather reed grass to add motion and contrast.
For regional guidance, resources like your local university extension office or the Plant Select database are invaluable for identifying climate-smart species.
Pollinator-Friendly Picks That Still Sip Water
Xeriscaping doesn’t just save water — it can support biodiversity. Choosing nectar-rich, low-water plants encourages bees, butterflies, and hummingbirds. Some of my favorites include:
- Milkweed (monarchs love it)
- Verbena (long-blooming and vibrant)
- Blanket flower (Gaillardia pulchella)
- Russian sage (Perovskia atriplicifolia)
A mix of native and adaptive pollinator plants creates a lively garden ecosystem that thrives with less effort and irrigation.
When you match the right plants to your environment, you’re not fighting nature — you’re partnering with it. The result is a landscape that’s both stunning and sustainable, no matter the season.
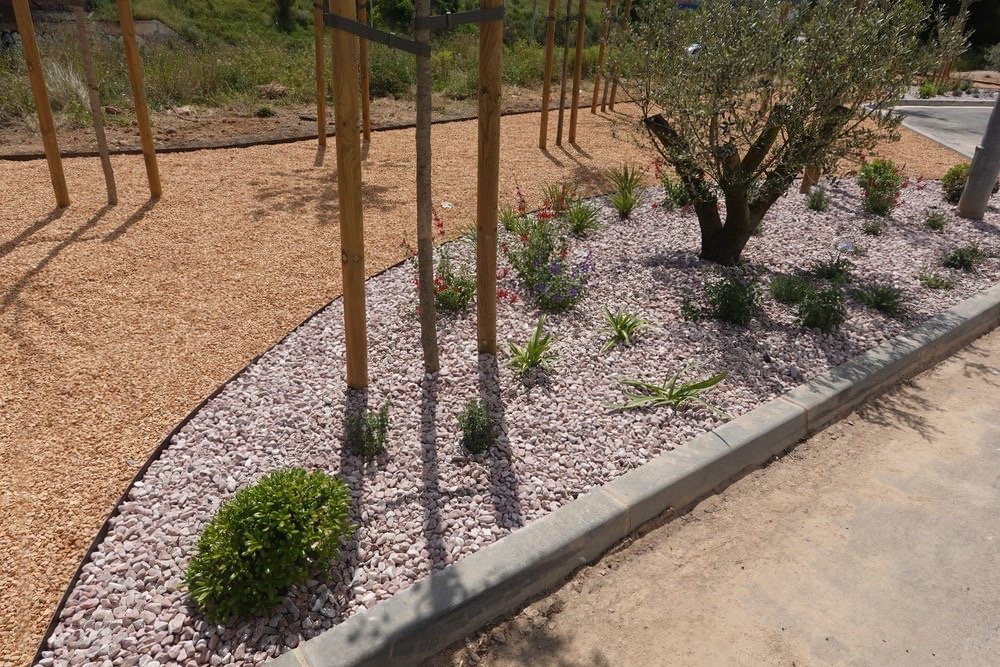
Xeriscape Design Tips: Hardscape, Mulch & Materials
The beauty of xeriscaping isn’t only in the plants — it’s also in the structure and texture of your landscape. Hardscape elements like gravel paths, boulders, and permeable patios bring visual rhythm while helping manage water runoff. Combined with the right mulch and materials, they complete the form-meets-function foundation of a truly sustainable yard.
When I transitioned my yard from turf to xeriscape, I quickly realized that thoughtful hardscaping didn’t just reduce maintenance — it made the space look intentional, polished, and cohesive year-round.
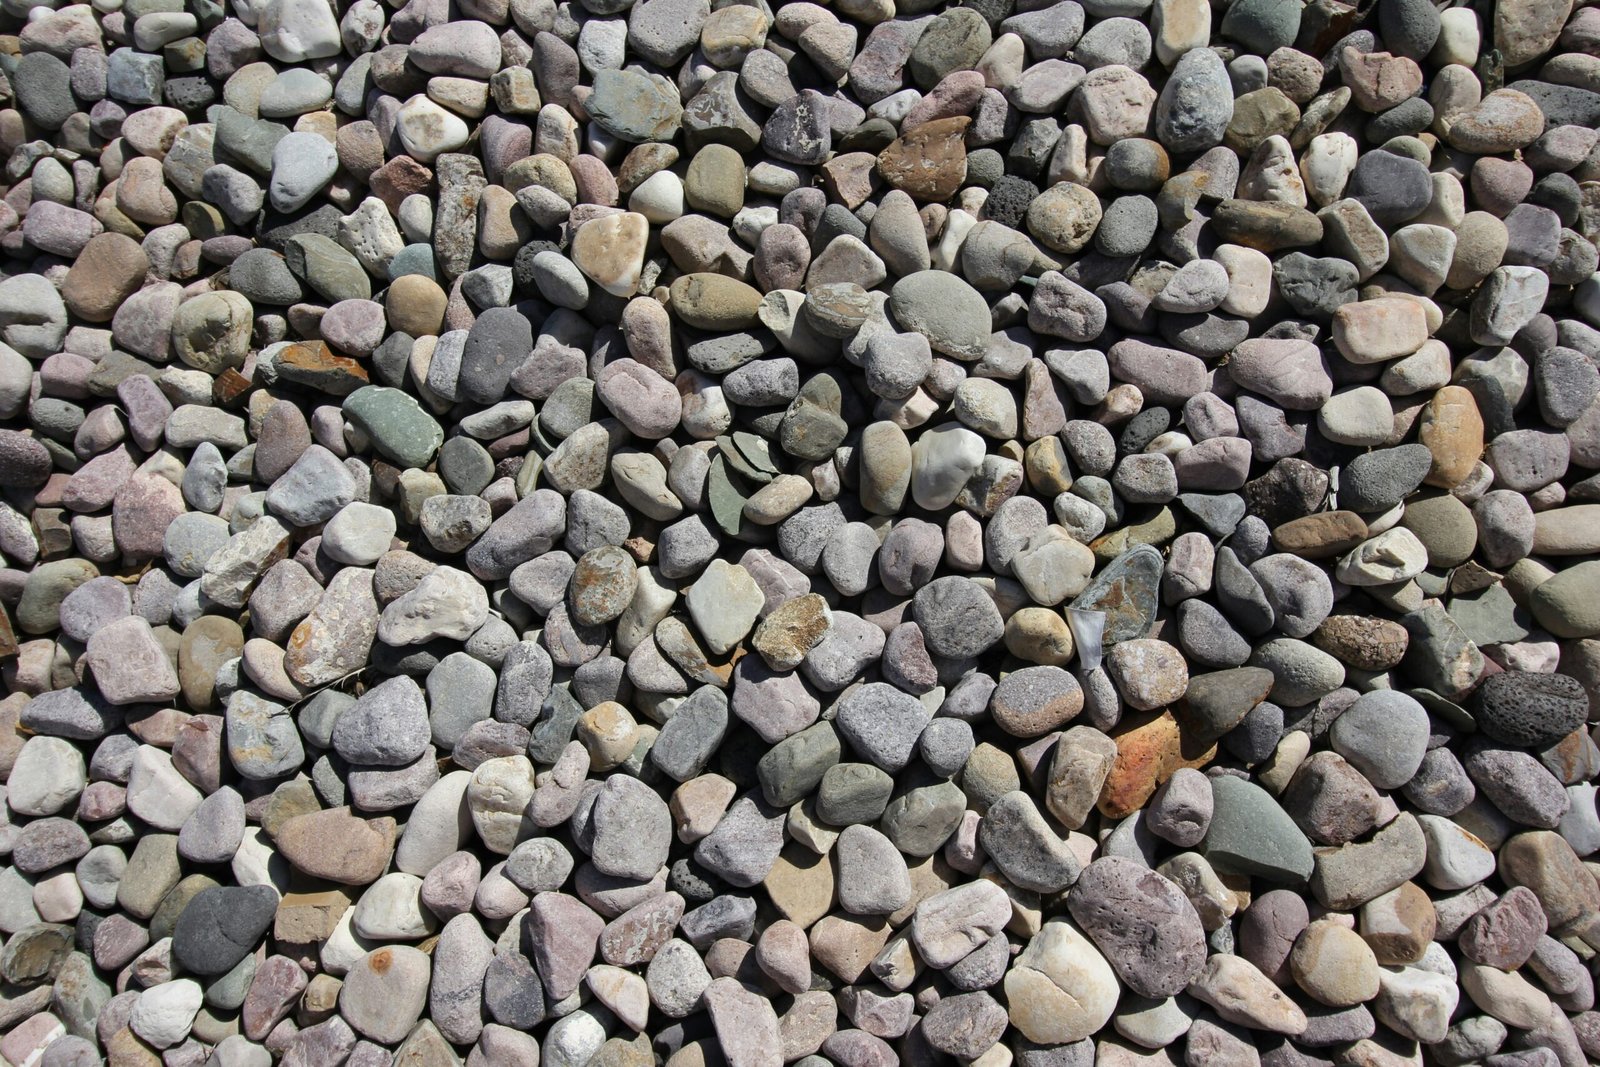
Gravel, Decomposed Granite, and Dry Creek Beds
Replacing grass with permeable surfaces is one of the easiest ways to save water. Gravel, crushed rock, or decomposed granite allow rain to infiltrate the soil while adding texture and warmth. Use them for:
- Pathways and patios that blend into the natural surroundings.
- Accent zones around garden beds or tree bases.
- Dry creek beds, which double as drainage features during heavy rain.
A dry creek bed lined with river rock not only channels water efficiently but also adds sculptural beauty — especially when paired with drought-tolerant perennials along its edges.
Where Mulch Matters Most (Types & Depths)
Mulch is one of xeriscaping’s quiet heroes. It insulates roots, suppresses weeds, and reduces evaporation — often cutting water use by up to 25% according to University of California Agriculture & Natural Resources.
Here’s how to use it effectively:
- Organic mulch: Shredded bark, compost, or wood chips enrich the soil over time.
- Inorganic mulch: Gravel or crushed stone works better in hot, arid regions where organic mulch breaks down too quickly.
- Depth: Maintain about 2–4 inches to retain moisture without suffocating roots.
Refresh mulch annually — it’s a simple step that keeps your xeriscape efficient and tidy.
Fire-Smart Spacing in Dry Regions
In areas prone to wildfires, xeriscaping doubles as a defensible space strategy. Maintain at least a 5-foot buffer between structures and any flammable mulch or shrubs. Replace high-oil plants (like juniper or eucalyptus) with fire-resistant options such as agave, aloe, or rockrose.
Use non-flammable materials like gravel, pavers, or bare soil around your home’s perimeter to prevent fire spread — a perfect example of beauty and safety working hand in hand.
By blending hardscape balance, smart mulching, and regional awareness, you turn xeriscaping from a trend into a lifestyle — one that’s water-wise, low-maintenance, and visually captivating.
Irrigation That Saves Water (and Time)
Even the best-designed xeriscape needs water — just far less of it than a traditional garden. The secret lies in precision irrigation: giving plants what they need, when they need it, and nothing more. When done right, irrigation in a xeriscape becomes a background process — efficient, automated, and sustainable.
When I first converted my yard, I swapped out my old sprinkler system for drip irrigation. Within months, I saw a dramatic drop in water use (and my utility bill). My plants actually looked healthier because they were receiving steady moisture directly to their roots instead of random overhead sprays.
Drip vs. Micro-Spray vs. Soaker: When to Use Each
Different irrigation systems suit different needs:
- Drip irrigation: Best for individual plants or shrubs. Water drips directly to the root zone, minimizing evaporation.
- Micro-spray: Ideal for flowerbeds or dense plantings where small, mist-like sprays cover a broader area.
- Soaker hoses: Perfect for rows of groundcovers or vegetable beds; water seeps slowly and evenly.
Drip systems typically save 30–50% more water than sprinklers, according to the U.S. Environmental Protection Agency (EPA). They’re also less likely to cause fungal diseases, since foliage stays dry.
Smart Controllers, Moisture Sensors, and Rain Shutoffs
Technology has made irrigation nearly effortless. Smart controllers adjust watering schedules automatically based on weather data, season, and soil moisture. They connect to Wi-Fi and local weather stations to skip watering on rainy or humid days — no guesswork required.
Installing moisture sensors in the soil ensures watering only happens when truly needed. Even a basic rain shutoff device prevents waste during unexpected storms, paying for itself within one season.
💡 Pro Tip: Run irrigation early in the morning (before 9 a.m.) or late evening (after 6 p.m.) to minimize evaporation.
How to Water New Plantings vs. Established Beds
Newly planted xeriscape plants need regular watering while they establish root systems — usually for the first 6–8 weeks. After that, gradually reduce frequency. The key is deep, infrequent watering: soak the soil deeply, then let it dry before watering again. This encourages plants to send roots downward, where moisture lingers longer.
Established xeriscape gardens can often go weeks between watering, depending on climate and soil. Once you learn your plants’ rhythm, you’ll spend less time managing irrigation and more time simply enjoying your yard.
By mastering efficient irrigation, you’re not just conserving water — you’re nurturing a smarter, more resilient ecosystem that practically runs itself.
Lawn Alternatives & Turf Reduction
Traditional lawns are beautiful, but they’re also water guzzlers. In many regions, turfgrass consumes more water than any other landscape element — often up to 50% of household outdoor water use, according to the EPA WaterSense program. That’s why xeriscaping encourages minimizing turf areas and replacing them with low-water alternatives that look just as inviting but require far less maintenance.
When I began reducing my lawn, I didn’t remove it all at once. Instead, I started with one section, replacing it with a mix of groundcovers, gravel paths, and flowering perennials. The result felt natural and spacious — not barren.
No-Mow Lawns, Clover Mixes & Groundcovers
If you’re not ready to give up a green look, consider no-mow or drought-tolerant lawn alternatives. They stay lush with minimal watering and never need weekly mowing:
- Clover blends: Microclover or white clover adds soft texture, fixes nitrogen in the soil, and stays green through droughts.
- Buffalo grass: A native prairie grass that thrives on little water and forms a fine, soft turf.
- Kurapia or thyme lawns: Low-growing, flower-topped options perfect for sunny spots.
These choices bring life back to the soil while cutting irrigation dramatically — a win for both your wallet and the environment.
Converting Lawn Areas Step-by-Step
If removing turf sounds intimidating, break it down:
- Start small. Pick a high-visibility or low-use area first.
- Smother grass naturally. Use cardboard and mulch layers (the sheet mulching method) instead of harsh chemicals.
- Amend the soil. Once the grass breaks down, add compost to improve texture and water retention.
- Replant with drought-tolerant landscaping plants. Mix natives, ornamental grasses, and perennials for a layered, natural look.
This gradual approach allows you to experiment without overwhelming your schedule or budget.
Keeping a Small, Purposeful Lawn
There’s nothing wrong with keeping a functional patch of turf for kids, pets, or gatherings — the goal is intentionality. Reduce your lawn to where it serves a real purpose and ensure it’s the most efficient variety for your climate. Use drip edges or smart irrigation to water only those zones, not the surrounding pathways.
Adding natural stone borders or plant beds around a small lawn can make it feel like an oasis — a soft centerpiece within your larger xeriscape design.
A lawn-free or lawn-light landscape doesn’t mean losing comfort or beauty. It means redefining what a yard can be — diverse, sustainable, and uniquely yours.
Maintenance Made Easy: Xeriscaping Care Calendar
One of the best perks of xeriscaping is how little maintenance it truly needs — especially once your plants are established. Instead of constant mowing, fertilizing, and watering, you’ll spend short, seasonal bursts of time fine-tuning and refreshing your garden. Think of it as gentle stewardship rather than endless yard work.
When I switched from a traditional lawn to a xeriscape, I was surprised by how much less I needed to do. The tasks became simpler: pruning a few shrubs, checking irrigation emitters, and spreading a new layer of mulch once or twice a year. My weekends felt free again — and my yard still looked great.

Seasonal Tasks for a Healthy Xeriscape
Here’s a quick breakdown of what to do — and when:
- Spring:
- Inspect irrigation lines and emitters for leaks.
- Refresh mulch and compost as needed.
- Trim back dormant perennials to encourage new growth.
- Summer:
- Monitor for weeds (they’re fewer, but they still happen).
- Water deeply but infrequently, especially during heatwaves.
- Check for pests and treat organically if necessary.
- Fall:
- Winter:
- Turn off irrigation systems if frost is common.
- Inspect hardscape elements (paths, gravel, edging) for wear.
- Plan new plantings for spring — this is when design inspiration strikes!
Fertility the Water-Wise Way
Traditional gardens often rely on synthetic fertilizers, but xeriscaping thrives on organic nutrition. Compost and slow-release fertilizers keep soil healthy and moisture-retentive without forcing excessive growth. A light top-dressing of compost once or twice a year usually does the trick.
Over-fertilizing can actually harm drought-tolerant plants, pushing them to grow faster than their roots can support. Think balance, not boost.
Monitoring Plant Stress and Irrigation Tune-Ups
Even the toughest water-wise plants can show signs of stress if irrigation drips clog or emitters misfire. A quick monthly walk-through — looking for wilted leaves or dry patches — helps you catch small issues before they spread.
I like to check my irrigation system right after a heatwave or rainstorm. Adjusting schedules seasonally (using a smart controller if possible) ensures plants get exactly what they need year-round — no more, no less.
By following a simple maintenance rhythm, your xeriscape will remain vibrant, low-stress, and rewarding for years to come. It’s a landscape that gives back more than it takes — which, to me, is the essence of sustainable living.
Budget & ROI: Costs, Savings, and Incentives
One of the most pleasant surprises about xeriscaping is how affordable it becomes in the long run. While the upfront investment can vary depending on your design and materials, the return on investment (ROI) is undeniable — especially when you factor in water savings, reduced maintenance, and the potential for local rebates.
When I transitioned my 1,200-square-foot front yard to a xeriscape, the initial cost felt like a big commitment. But within two years, my water bills had dropped by nearly 45%, and I was spending almost nothing on fertilizers or lawn care. It quickly paid for itself — and added curb appeal that boosted my home’s value.
Typical Project Budgets (DIY vs. Professional)
The cost of xeriscaping depends on whether you tackle it yourself or hire pros:
- DIY projects: Typically run between $1–$2 per square foot, mostly for materials like mulch, soil amendments, and plants.
- Professional installations: Range from $5–$15 per square foot, depending on complexity (irrigation systems, stonework, or custom design features).
You can lower costs by working in phases — start with one area (like your front entry or a sunny slope) and expand as budget allows. Reusing rocks, pavers, and existing plants also saves money while reducing waste.
Water Bill Savings and Payback Timeline
According to the Metropolitan Water District of Southern California, homeowners can save up to 60% of outdoor water use by converting to xeriscaping. For most households, that translates to hundreds of dollars saved annually.
If you invest around $3,000 in your landscape, you could break even within three to five years, depending on your local water rates. After that, your savings continue indefinitely — plus, your landscape stays beautiful with far less effort.
Rebates, City Programs, and HOA Compliance
Many cities and water agencies now reward homeowners for switching to drought-tolerant landscaping. Check local programs through:
- EPA WaterSense Rebate Finder
- Your regional water utility or city’s conservation office
- County extension programs for native plants
Some homeowner associations (HOAs) once resisted xeriscaping, but attitudes are changing. In many states, “right-to-dry” laws protect residents’ ability to install water-wise landscaping, even in HOA communities. Always confirm local regulations before starting, and provide design visuals to show that xeriscaping can be elegant, not barren.
Ultimately, xeriscaping is both a financially smart and environmentally responsible investment. You’ll save money, boost property value, and play a small but powerful role in conserving one of our planet’s most precious resources — water.
Mistakes to Avoid: Lessons I Learned
Every xeriscaping project teaches a few lessons the hard way — I certainly made my share of rookie errors. While xeriscaping is forgiving overall, certain missteps can waste time, water, and money. The good news? Most of them are easy to prevent with a little foresight and patience.
As I refined my first xeriscape, I learned that success isn’t about perfection — it’s about understanding how nature works and staying flexible. Here are some of the most common pitfalls (and how to sidestep them).
Overwatering Drought Plants & Mixing Hydrozones
This might be the number one mistake I see — and I made it myself. Drought-tolerant plants don’t want daily watering, especially once they’re established. I used to assume more water meant faster growth, but the opposite is true: overwatering can suffocate roots and invite fungal diseases.
The solution is hydrozoning — grouping plants with similar water needs. Keep high-water ornamentals (like annuals or roses) in one section, and hardy natives (like yucca, sage, or lavender) in another. This lets you tailor irrigation schedules efficiently and avoid drowning the tough species that thrive on neglect.
Skipping Soil Prep or Mulch
I once planted an entire bed without improving the soil — it looked fine for a few months, then everything started struggling. Without compost or organic material, sandy soils lose moisture too quickly, and clay soils suffocate roots.
Before planting, always test and amend your soil to strike a balance between drainage and retention. And never skip mulch — it’s your garden’s insulation. Mulch prevents evaporation, stabilizes temperature, and keeps weeds from stealing water. A few inches of bark, gravel, or composted wood chips go a long way.
Planting the Wrong Species for Your Region
Even drought-tolerant plants can fail if they’re not suited to your specific climate. For example, agaves love heat but rot in cold, wet winters. Similarly, desert sage won’t thrive in humid regions. Early in my journey, I lost several plants simply because I picked them from a “low-water list” without checking their hardiness zones.
Always use region-appropriate selections from local nurseries or university extension lists — they’ll know what thrives where you live. Tools like the USDA Plant Hardiness Zone Map help ensure your choices align with your environment.
Mistakes are part of the learning curve, but they’re also what make xeriscaping rewarding. Each adjustment teaches you how your yard breathes, drinks, and grows — and with time, you’ll end up with a landscape that feels effortless, resilient, and beautifully yours.
Real-World Xeriscaping Ideas & Mini Case Studies
Theory is great, but seeing xeriscaping in action brings everything together. Whether you’re transforming a small courtyard, a suburban front yard, or a full-acre property, the same principles apply — adapt to your climate, work with natural water flow, and celebrate texture and form. Below are three real-world examples (inspired by actual projects and my own experience) that show how versatile xeriscaping can be.
Small Urban Courtyard (12–20 m²)
Goal: Create a private, lush-feeling retreat in a compact city space.
This homeowner in Phoenix replaced a patch of struggling lawn with a mix of gravel, pavers, and container-grown succulents. A central water feature — a simple ceramic pot fountain — adds sound and coolness without wasting water.
Key features:
- Plant palette: Agave, aloe, Mexican feather grass, and desert marigold.
- Irrigation: Drip emitters on a timer feeding only containers.
- Design trick: Vertical trellis with drought-tolerant vines adds shade and privacy.
The result? A courtyard that looks sophisticated year-round, needs watering just once a week in summer, and doubles as an evening relaxation space.
Suburban Front Yard Makeover
Goal: Replace high-maintenance turf with an attractive, family-friendly landscape.
In Austin, Texas, one family removed 1,000 square feet of grass and replaced it with decomposed granite walkways, hydrozones of native plants, and a seating area framed by boulders and lavender hedges.
Plant palette: Texas sage, lantana, red yucca, blue grama grass.
Extras: Low-voltage lighting for curb appeal and safety.
The project cost around $3,500 DIY — but reduced monthly water use by over 40%. Within a year, neighbors were asking for design tips.
Hot-Summer, Cold-Winter Success Story
Goal: Prove xeriscaping works even in four-season climates.
In Denver, Colorado, I helped a friend transition her traditional lawn into a climate-smart garden using native and adaptable perennials. Winters were harsh, summers dry — but the new garden thrived.
Plant palette: Blanket flower (Gaillardia), blue flax, Russian sage, switchgrass, and dwarf coneflower.
Irrigation: Smart controller with moisture sensors.
Design strategy: Berms to improve drainage and retain heat during cold snaps.
By the second season, her yard was bursting with color — and local pollinators had moved in. It’s now a local example of how low-water gardening can succeed in mixed climates.
Each of these examples shows the flexibility of xeriscaping: it’s not one style, but a design language that adapts to your space, goals, and region. From modern minimalism to wild native meadows, xeriscaping empowers you to craft beauty that’s both sustainable and deeply personal.
Conclusion
When I first started exploring xeriscaping, I thought it was simply about saving water — but it turned out to be much more. It changed how I saw my outdoor space. I began to appreciate the relationship between design, ecology, and efficiency — the idea that beauty doesn’t have to come at nature’s expense.
A well-planned xeriscape is more than a yard; it’s a living system that evolves with the seasons. It invites pollinators, cools the surrounding air, and thrives even through drought. Most importantly, it gives you freedom — fewer chores, lower bills, and a garden that feels effortless.
Whether you start with one flower bed or a full landscape overhaul, every small step toward low-water gardening makes a difference. Begin by observing your yard, testing your soil, or replacing one patch of turf with drought-tolerant perennials. The rewards will quickly show themselves — in color, life, and the quiet satisfaction of knowing your landscape works with nature, not against it.
If you’re ready to create a yard that’s beautiful, sustainable, and resilient for years to come, now’s the perfect time to begin. Start your xeriscaping journey today — your wallet, your community, and the planet will all thank you.
Alex is the creator of Homely Haven, a space dedicated to simple, stylish ideas for interiors and gardens alike. With a passion for cozy living rooms, inviting outdoor spaces, and practical DIY solutions, Alex shares tips and guides that help turn any house into a true home.
From budget-friendly decorating hacks to weekend garden projects, the goal is always the same: to inspire you to create spaces that feel personal, beautiful, and welcoming. When not writing, Alex is usually rearranging furniture, sketching new garden layouts, or exploring design trends for the next project.