You walk into your garden and something feels… unfinished.
Maybe you’ve got lush plants, a cosy patio, even a bit of lawn—but you still find yourself hopping over muddy patches, stepping on random stones, or following a trampled line across the grass.
You don’t just want to fix it. You want it to feel intentional.
Beautiful. Welcoming. Like it belongs in one of those dreamy garden magazines—but without the feeling that it’s out of reach.
The thing is, designing a garden pathway isn’t just about looks. It’s about guiding the eye and the feet. It’s about tying your outdoor space together in a way that feels effortless—and actually works for how you use it every day.
I’ve seen the transformation a good path can bring. And in this article, you’ll learn exactly how to design one that fits your space, matches your style, and stands up to daily life—without hiring a landscape architect.
Let’s dig in.
What Makes a Garden Pathway ‘Functional’?
A pathway might look great in a photo, but if it’s awkward to walk on, floods after rain, or doesn’t actually lead where you need to go, it’s not doing its job.
Here’s what makes a garden path actually functional:
1. It connects key areas in your garden
Start by thinking practically. Where do you walk most often? From your back door to the shed? The patio to the compost bin? Your path should support how you already move through your garden—not fight against it.
Quick tip: Grab a cup of tea and walk through your garden as you normally would. Notice the worn-down grass or natural tracks. That’s your starting point.
2. It’s wide enough to walk comfortably
A good rule of thumb:
- 60cm wide for a single-person path
- 90–120cm wide for two people side-by-side
Paths that are too narrow feel cramped and can quickly get overgrown. Go a bit wider than you think, especially if the edges will be softened with plants.
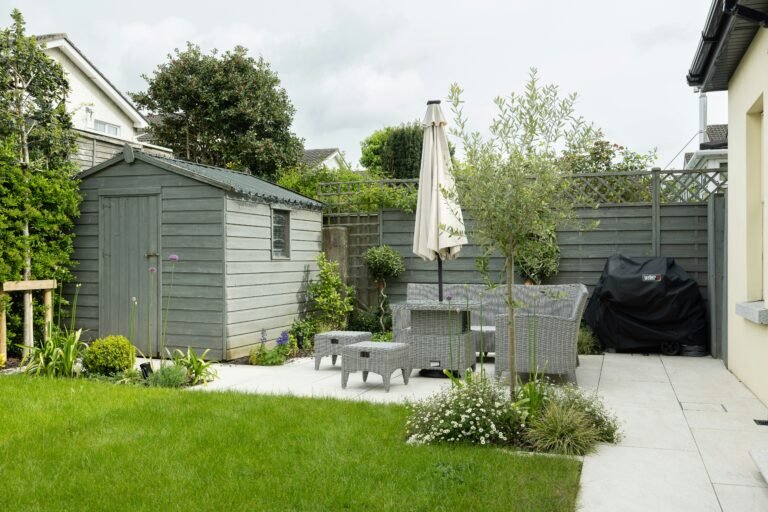
3. It feels safe underfoot
Choose materials that don’t get slippery when wet. Textured stone, compacted gravel, or bricks with grip are all better than slick tiles or polished concrete.
Also consider the slope—steep paths can become dangerous in the rain. If you’re working with a sloped garden, think about using steps, terraces, or zigzag routes to ease the gradient.
4. It drains well
Water pooling on your path? It’s not just annoying—it breaks down materials and creates slippery spots.
- Gravel is naturally permeable.
- Pavers or stones need proper spacing and a solid, well-draining base.
- Avoid laying anything flat over heavy clay soil without a proper sub-base.
5. It’s easy to maintain
If you love the rustic look of a stepping stone path with grass in between, make sure you’re happy to strim or weed regularly. If not, opt for something lower maintenance—like gravel with weed-suppressing membrane underneath.
Choosing the Right Materials for Your Style and Climate
The materials you choose will shape not just how your path looks, but how it feels to walk on, how it holds up over time, and how much maintenance it needs. This is where style meets practicality.
Here’s how to pick the right one for your space.
1. Gravel: Affordable and Adaptable
Gravel suits almost any garden style, from rustic to contemporary. It’s also great for drainage and relatively easy to install.
Pros:
- Budget-friendly
- Good drainage
- Easy to shape and adjust
Cons:
- Can scatter without a border
- Harder to walk on with wheels (e.g. prams or wheelbarrows)
Best for: Cottage gardens, informal spaces, areas where water runoff is an issue.
2. Natural Stone: Timeless and Textured
Stone paths bring a classic, high-end feel. You can go neat and formal with cut slabs, or more organic with irregular flagstones.
Pros:
- Durable
- Visually striking
- Works with both traditional and modern gardens
Cons:
- Can be expensive
- Needs a solid base to prevent sinking or wobbling
Best for: Formal gardens, Mediterranean styles, creating a feature walkway.
3. Brick: Charming and Traditional
Brick paths give a warm, earthy look and can be laid in patterns like herringbone or basket weave for extra flair.
Pros:
- Strong visual appeal
- Good grip
- Eco-friendly if using reclaimed bricks
Cons:
- Can get mossy and slippery if not maintained
- Requires solid base and edge restraint
Best for: Period homes, cottage gardens, anyone going for a “storybook” look.
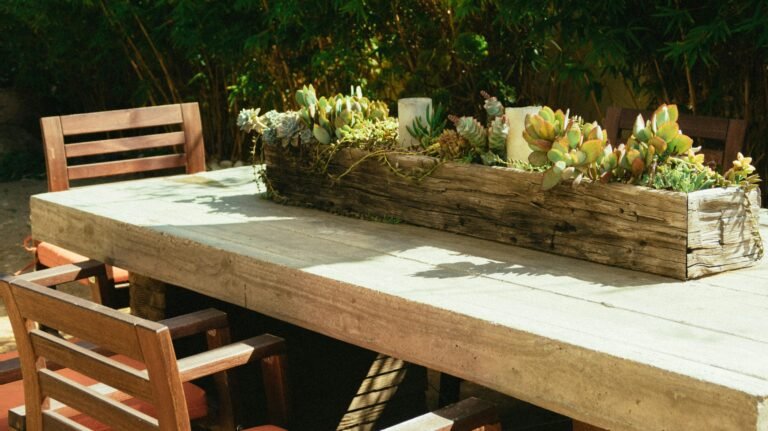
4. Wood: Natural and Warm
Timber sleepers, decking, or log slices can add warmth and texture to a garden, especially when mixed with plants.
Pros:
- Soft underfoot
- Great for naturalistic or woodland styles
Cons:
- Can rot or become slippery if not treated
- Higher maintenance in damp climates
Best for: Woodland gardens, eco-style designs, quirky or creative paths.
5. Concrete or Pavers: Clean and Contemporary
Modern concrete pavers can be sleek and minimal, or moulded to mimic natural stone. They’re often used in modern designs for clean lines and contrast.
Pros:
- Uniform and predictable
- Easy to maintain
- Versatile in shape and size
Cons:
- Can look flat or dull if not softened with planting
- Needs proper sub-base and drainage
Best for: Contemporary gardens, small urban spaces, areas needing sharp structure.
Want to mix materials? That’s completely valid—and often gorgeous. For example:
- Gravel between stone slabs
- Brick edges around concrete pavers
- Wood slices set into gravel
It’s all about balance—materials should complement your garden’s style, not compete with it.
Design Tips That Make a Pathway Beautiful
Once you’ve got the practical bits sorted—layout, width, and materials—this is where the magic happens. These are the simple design choices that turn a basic path into a standout feature.
1. Curves vs Straight Lines
- Straight paths feel formal, direct, and structured.
- Curved paths feel relaxed, natural, and inviting.
If you want your garden to feel bigger, a gently winding path can help create that sense of exploration—leading the eye around the space instead of straight through it.
Quick tip: Don’t overdo it. Overly wiggly paths can look forced. Gentle curves usually feel most natural.
2. Use Edging to Define the Space
Edging keeps gravel in place, stops grass from creeping in, and gives your path a polished look. It can also add texture or contrast.
Options include:
- Bricks laid flat or upright
- Steel or aluminium edging
- Timber sleepers
- Cobblestones or small pavers
Choose something that complements your path material and garden style.
3. Think About What’s Alongside the Path
Planting along the edges softens hard materials and makes your garden feel more immersive.
- Low-growing herbs (like thyme or chamomile) release scent when brushed past.
- Taller grasses or perennials can line a border path to create a sense of arrival.
- Creeping plants like sedum or creeping Jenny can spill over the edges for a lush, “settled-in” look.
Design note: Don’t plant too closely—leave room to walk without brushing wet leaves or getting scratched by stems.
4. Add Lighting for Ambience and Safety
Outdoor lighting makes paths usable after dark, but it also adds atmosphere. Go subtle with low-level lights, or bold with lanterns or uplighting.
Try:
- Solar stake lights for a quick and easy fix
- Recessed lighting set into edging or steps
- String lights overhead if your path runs under pergolas or trees
5. Use Repetition for a Cohesive Feel
Repetition is a classic design trick. Whether it’s repeating a plant, a colour, or a shape—using elements more than once helps your path feel intentional and connected to the rest of your garden.
DIY vs Pro: What You Can (Actually) Do Yourself
You don’t need to be a builder or a landscape designer to create a beautiful path—but it helps to know where your limits are. Some pathways are totally doable as a weekend project. Others might be better left to the pros, depending on your tools, time, and terrain.
✅ What’s Typically DIY-Friendly:
- Gravel paths: Especially if they’re short and flat. You’ll need to dig a shallow trench, lay a weed membrane, and spread gravel with a rake.
- Stepping stone paths: Lay stone slabs or pavers into soil, gravel, or lawn, spacing them to match your stride.
- Simple edging: Brick, timber, or metal edging can usually be installed with a spade and a bit of patience.
Tools you’ll likely need:
Spade, rake, wheelbarrow, spirit level, mallet, weed membrane, and gravel or sand depending on the material.
🛠 What Might Need a Pro:
- Paths on a slope: You’ll need proper drainage and possibly steps or retaining structures.
- Paving with mortar or concrete base: Requires levelling, mixing, and knowing how to avoid future cracks or wobble.
- Intricate patterns or large-scale layouts: More technical detail means more room for error—and higher costs if you need to redo it.
💡 Honest Take:
If your design is simple and you’re working with gravel, wood, or dry-laid pavers, give it a go. Worst case? You lift it up and start again.
But if the path is structural, supporting foot traffic year-round, or cutting through tricky terrain—you’ll save time, stress, and probably money by getting professional help from the start.
Common Mistakes to Avoid
Even the most beautiful materials and designs can fall flat if you skip a few key details. These are the classic garden pathway mistakes that trip people up—literally and figuratively.
1. Ignoring Drainage
If water pools on your path every time it rains, something’s gone wrong. Without proper drainage:
- Gravel washes away
- Stone gets slippery
- Frost damage becomes more likely
Fix it early: Use a sub-base like compacted hardcore, install slight slopes for runoff, and avoid placing paths in natural dips without a plan to redirect water.
2. Choosing Looks Over Practicality
A path should be safe and comfortable to walk on. Smooth tiles might look stunning in a photo, but they’re a hazard in rain or frost. Stepping stones spaced too far apart? A twisted ankle waiting to happen.
Rule of thumb: Walk the path in your mind—or better yet, mark it out and test it before you commit.
3. Making It Too Narrow
This is a big one. Narrow paths get lost in the landscape and become awkward to use, especially when overgrown.
Aim for:
- 60cm minimum for solo use
- 90–120cm for shared or high-traffic areas
If you’re adding plants along the edges, give yourself extra space to account for growth.
4. Skipping the Edging
Without edging, gravel spills out, plants creep in, and the whole thing starts to feel messy. Even low-key paths benefit from simple edging to keep everything in place.
Tip: Choose edging that matches your garden’s style—natural timber for a relaxed look, or bricks for something more classic.
5. Placing It in the Wrong Spot
Don’t fight how people naturally move through your garden. If your path takes the long way around, people will just walk straight across the grass and create a new one.
Start with function and then design around it.
Bringing It All Together: Visual Examples & Inspiration Ideas
By now, you’ve got a sense of what makes a garden path functional, beautiful, and achievable. But if your mind’s still swimming with options, here are a few styles you can lean into—along with practical notes to help you visualise what could work in your garden.
🌿 1. The Rustic Gravel Path
Imagine: Crushed gravel bordered with reclaimed bricks, winding softly through tall grasses and wildflowers.
- Why it works: It looks relaxed but still intentional, and the materials are affordable.
- Perfect for: Cottage gardens, country homes, or anyone wanting that “unfussy but charming” vibe.
Add a twist: Line it with lavender or thyme—plants that release scent when brushed.
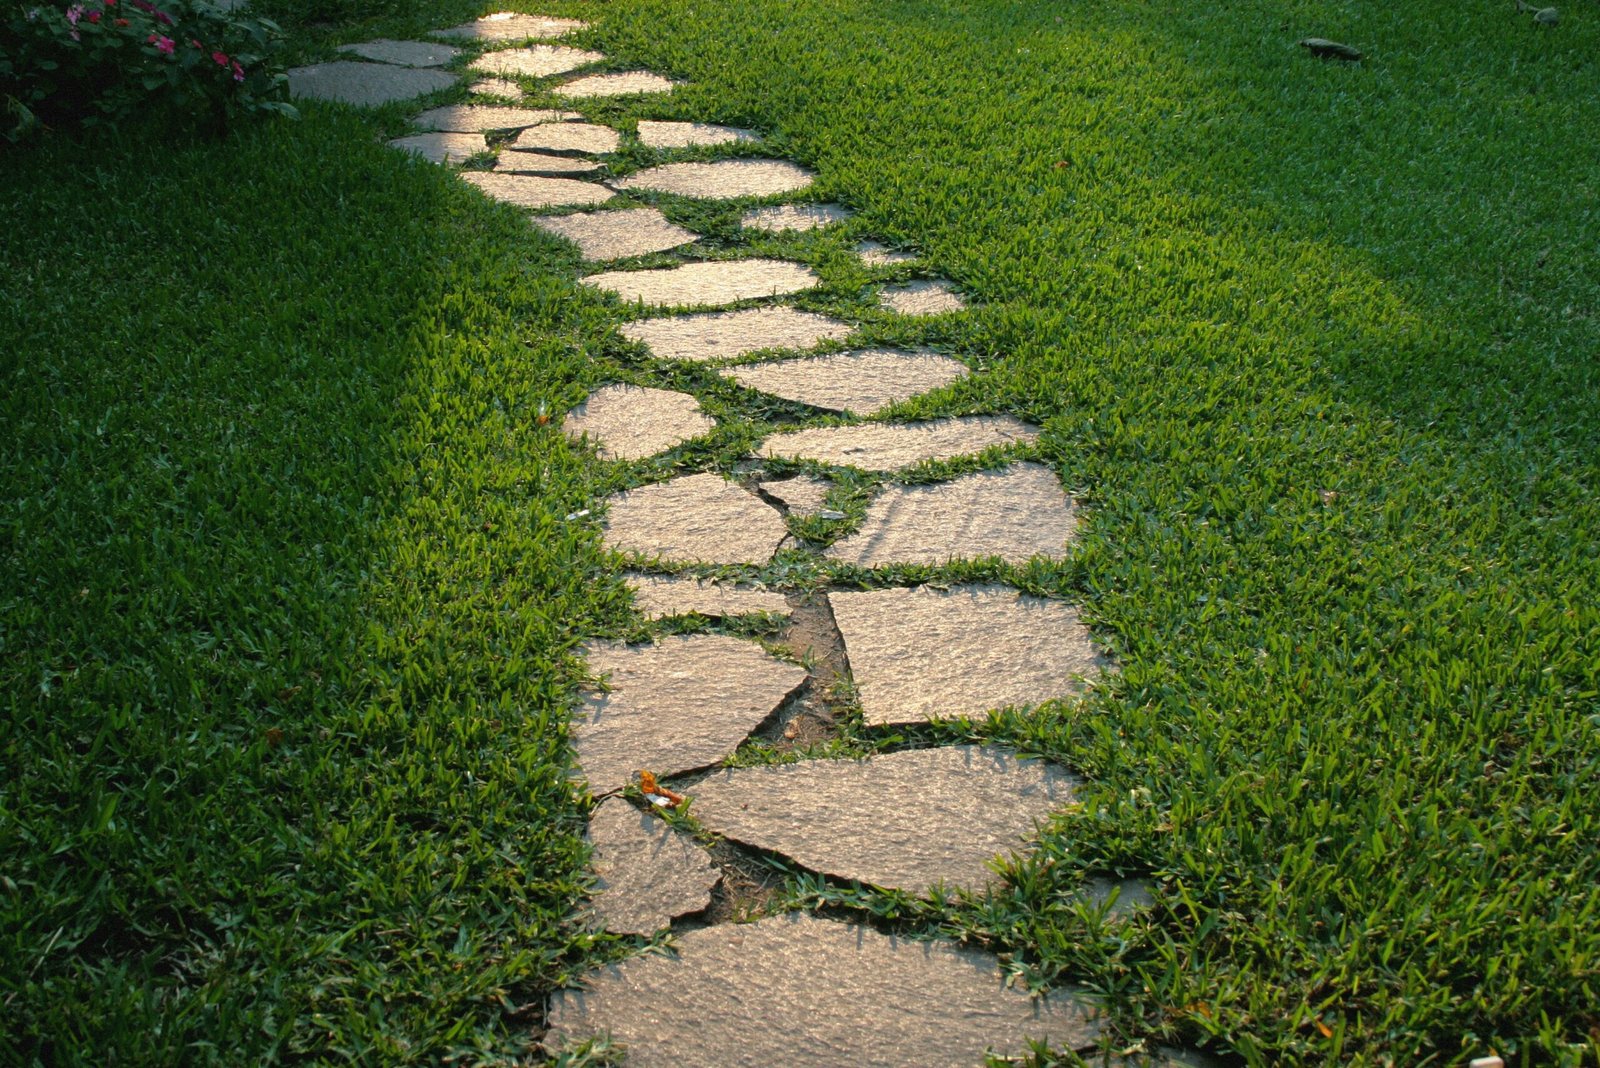
🪨 2. The Flagstone Stepping Path
Imagine: Wide, irregular stone slabs spaced across a lawn or set into ground cover like creeping thyme or moss.
- Why it works: It blends beautifully into natural surroundings and feels casual but classy.
- Perfect for: Woodland gardens, side paths, or informal walkways to a bench or shed.
Keep in mind: Leave comfortable spacing—roughly one step apart. Too close = cluttered, too far = awkward.
🧱 3. The Brick Formal Walk
Imagine: A straight brick path in a herringbone pattern, bordered by low boxwood hedges or neatly clipped plants.
- Why it works: It’s symmetrical, tidy, and timeless.
- Perfect for: Front gardens, heritage homes, or small city gardens where you want a bit of order.
Pro tip: Use reclaimed bricks for character and eco-cred. Make sure the path has a solid base to avoid shifting.
🪵 4. The Timber Slice Trail
Imagine: Circular cuts of tree trunks (or faux log pavers) set into gravel or mulch, weaving through a shaded garden.
- Why it works: It feels playful and blends perfectly with a natural or forest-style space.
- Perfect for: Family gardens, eco-focused designs, or tucked-away corners.
Heads-up: Use treated timber or composite alternatives to avoid rot and slipperiness.
🔲 5. The Modern Grid Path
Imagine: Large concrete or porcelain pavers laid in a neat grid, with gravel or grass between the gaps.
- Why it works: It’s clean, bold, and makes a small space feel more structured.
- Perfect for: Contemporary homes, low-maintenance gardens, or patios.
Style tip: Mix with sleek metal edging or minimalist lighting to really complete the look.
There’s no one “right” path—only the one that fits your garden, your lifestyle, and your taste.
Start Where You Are, and Grow From There
You don’t need a sprawling estate or a professional crew to create a garden path that’s both beautiful and functional. You just need a clear idea of how you want your space to feel—and a plan that fits how you actually use it.
Whether you’re laying down a simple gravel trail this weekend or sketching out a longer-term dream with natural stone and lighting, the key is to start. Small changes—like edging an existing path, or planting alongside it—can have a big impact.
Remember:
- Choose materials that suit your space and style.
- Prioritise drainage and ease of movement.
- Don’t forget the details—plants, lighting, and edging go a long way.
Most of all, your garden path should invite you out into the space. It should make you want to walk, explore, and enjoy what you’ve created.
Start where you are. Build what you can. And let your garden grow with you.
Alex is the creator of Homely Haven, a space dedicated to simple, stylish ideas for interiors and gardens alike. With a passion for cozy living rooms, inviting outdoor spaces, and practical DIY solutions, Alex shares tips and guides that help turn any house into a true home.
From budget-friendly decorating hacks to weekend garden projects, the goal is always the same: to inspire you to create spaces that feel personal, beautiful, and welcoming. When not writing, Alex is usually rearranging furniture, sketching new garden layouts, or exploring design trends for the next project.