Starting a compost bin at home is one of the most rewarding ways to turn kitchen and yard waste into nutrient-rich soil. When I first learned how to start a compost bin, I was amazed at how simple the process was — and how quickly it reduced my household trash. Composting not only improves your garden but also cuts down on landfill waste, lowers methane emissions, and helps you save money on fertilizer. Composting is also a key principle in sustainable garden design. Learn how it ties into full-system thinking in Permaculture Gardening Basics: How to Build a Sustainable Garden.
Why Composting Matters
Composting is a natural recycling process that turns organic material into “black gold” for your garden. The compost you produce enriches soil, promotes healthy plant growth, and improves moisture retention. According to the U.S. Environmental Protection Agency (EPA), composting also reduces greenhouse gases by diverting food scraps and yard waste from landfills. It’s an easy way to make a direct environmental impact right from your backyard.
What You’ll Need at a Glance
Here’s a quick list of what you’ll need before starting your backyard composting journey:
- A bin or container: You can buy a compost bin, use a tumbler, or even build your own from wooden pallets.
- Brown materials: Dry leaves, straw, cardboard, shredded paper (these provide carbon).
- Green materials: Vegetable scraps, coffee grounds, grass clippings (these provide nitrogen).
- Tools: A garden fork or shovel for turning, and a small watering can or hose for moisture.
Keep your bin in a shaded, well-drained area that’s easy to access from your kitchen and garden.
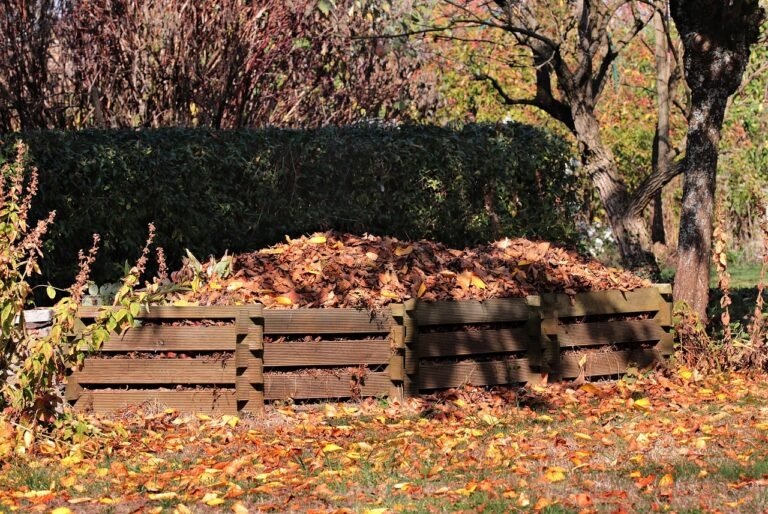
The Composting Timeline
Composting doesn’t happen overnight. Depending on your materials, moisture, and temperature, you can expect finished compost in two to six months. Turning your pile regularly speeds up the process by increasing airflow and encouraging beneficial microbes. Over time, you’ll notice the pile transform into dark, crumbly compost with an earthy smell — a sure sign your homemade soil is ready to use.
When I started composting, I was surprised by how quickly the pile “came alive.” Within a few weeks, the temperature rose, steam rose on cool mornings, and the process felt tangible — a small ecosystem in motion.
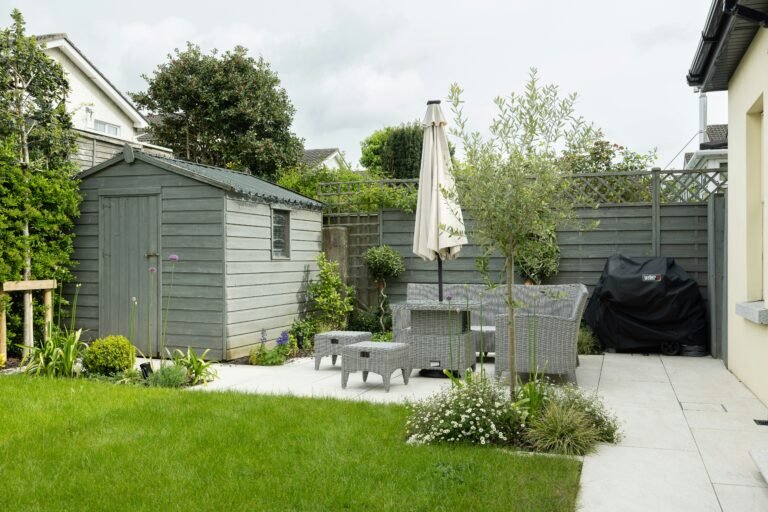
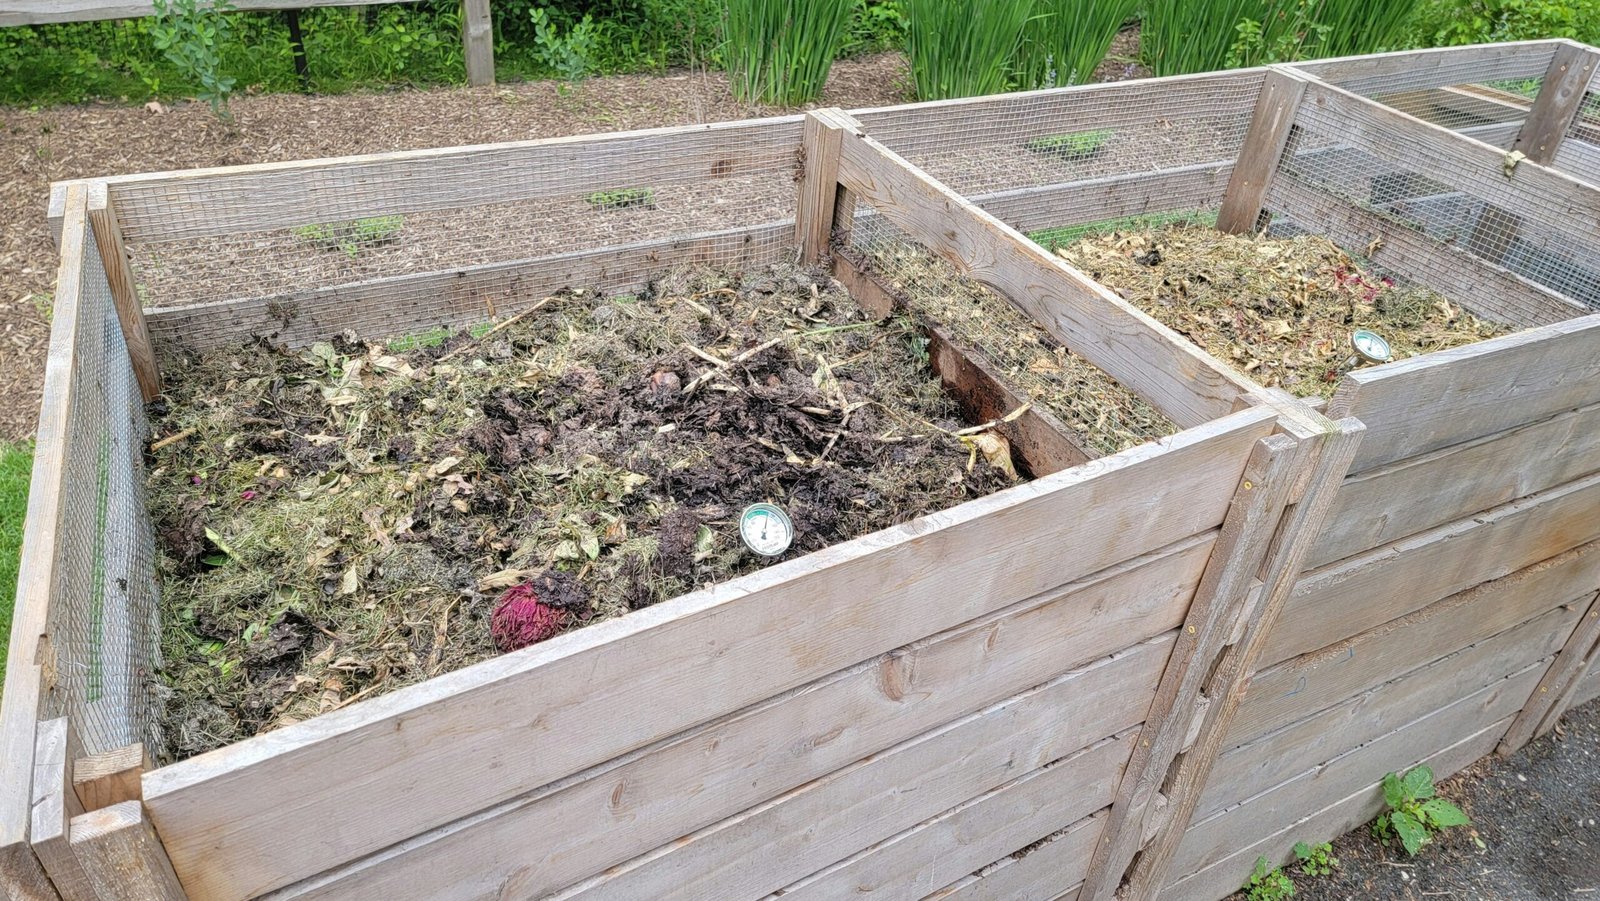
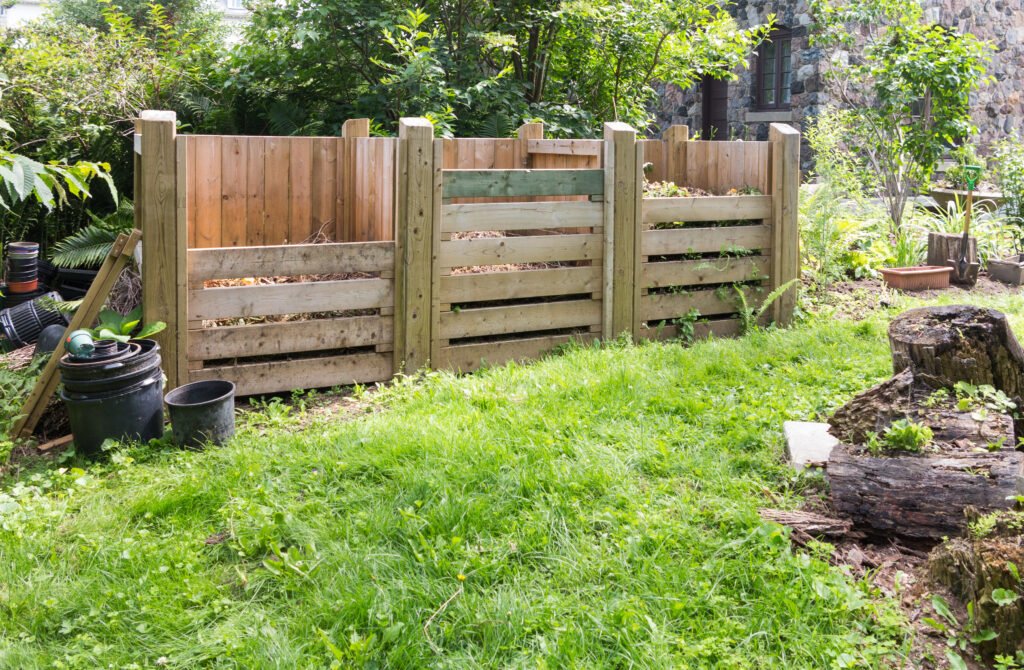
Backyard Composting Setups: Bins, Piles & Tumblers
When it comes to backyard composting, there’s no one-size-fits-all setup. Your space, budget, and level of involvement determine which composting system fits best. I’ve tried a few over the years — from simple open piles to sleek tumblers — and each has its charm and challenges.
Stationary Bin vs. Tumbler vs. Open Pile
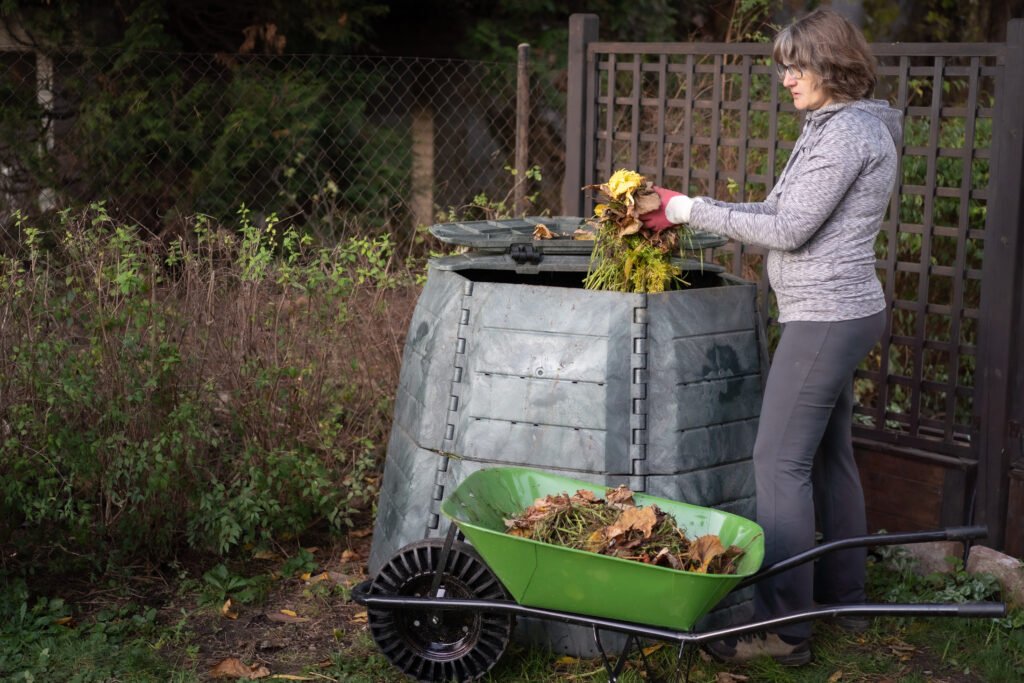
A stationary bin is ideal if you want a low-maintenance solution. It’s essentially a container — plastic, wood, or wire — that holds your compost materials neatly. These bins work well for moderate household waste and don’t require much turning.
A tumbler, on the other hand, is a rotating barrel that simplifies aeration. Just turn it a few times each week, and you’ll speed up decomposition significantly. Tumblers are excellent for smaller yards or people who want a tidier, enclosed system.
An open compost pile is the simplest and cheapest option — perfect for large gardens and generous space. It’s easy to scale but can attract pests or look messy if not maintained.
👉 Tip: If you’re unsure where to start, choose a bin with a lid and good airflow — it balances tidiness and efficiency.
For more setup guidance, the NRDC’s home composting guide provides practical visuals and comparisons.
Want to build your bin sustainably? Check out Upcycled Garden Decor Ideas for Sustainable Outdoor DIY Projects for clever ways to reuse materials in your garden setup.
Sizing Your System for Household Waste
The ideal size for most households is around 3×3 feet (1×1 meter). This provides enough mass to heat up and decompose effectively while remaining easy to turn. If you produce lots of yard waste, consider a second bin to allow one pile to “cook” while you add new materials to the other.
Choosing a Location
Placement is crucial. Set your compost bin on bare soil to allow worms and microbes to enter. Avoid direct sun — too much heat dries the pile — but don’t hide it in deep shade either. Partial shade with easy access to water and your kitchen door is perfect.
When I moved my first bin closer to the garden path, composting became part of my routine. Tossing in scraps after dinner and turning the pile weekly felt effortless.
What Can You Compost? Browns, Greens & Ratios
Before diving deeper into how to start a compost bin, it’s essential to understand what goes into it — and in what balance. Composting is basically a dance between two types of materials: browns (carbon-rich) and greens (nitrogen-rich). Get this balance right, and your compost will break down smoothly with minimal odor and maximum nutrients.
Browns (Carbon) vs. Greens (Nitrogen) Explained
Browns are dry, fibrous materials that give structure to your compost and help air circulate. Think:
- Dried leaves
- Straw or hay
- Shredded newspaper or cardboard
- Sawdust (in small amounts)
Greens, on the other hand, are wet and nutrient-rich. They feed the microorganisms responsible for breaking everything down. Examples include:
- Fruit and vegetable scraps
- Coffee grounds and filters
- Fresh grass clippings
- Plant trimmings
A good rule of thumb is to aim for two to three parts browns to one part greens. This ratio keeps the compost balanced — not too soggy, not too dry.
Ideal C:N Balance and Easy Layering Formula
Scientifically, compost thrives at a carbon-to-nitrogen (C:N) ratio of about 30:1. But you don’t need to overthink it. When building your pile, simply alternate layers — a few inches of browns followed by a thinner layer of greens. Always cover fresh food scraps with browns to deter pests and control odor.
I found that using shredded leaves as a “blanket” layer after each kitchen scrap addition kept things tidy and odor-free.
What to Avoid in Composting
Not everything decomposes safely or efficiently. Avoid:
- Meat, dairy, or oily foods: they attract pests and smell unpleasant.
- Diseased plants or weeds with seeds: they might survive the composting process.
- Pet waste: unsafe for vegetable gardens due to pathogens.
- Synthetic materials: plastic, coated paper, or treated wood chips.
For a clear list, check out the University of Illinois Extension’s composting guide.
By mastering the balance of browns and greens, you set the foundation for rich, crumbly compost — the heart of every successful backyard composting system.
How to Start a Compost Bin: Step-by-Step Setup
Now that you understand the materials, let’s put everything together. This is the fun part — actually building your compost bin and starting your first batch. When I first learned how to start a compost bin, I followed a few simple steps, and within weeks, my kitchen scraps were transforming into rich, earthy compost.
Step 1: Prepare the Base Layer and Airflow
Start by placing your bin directly on bare soil. This lets earthworms and beneficial microbes enter and helps with drainage. To improve airflow, lay down a 4–6 inch layer of coarse browns such as small branches, straw, or wood chips. Think of this as your compost’s breathing foundation.
If you’re composting on a patio or balcony, place a layer of sticks or shredded cardboard at the bottom of your container for similar results.
Step 2: Alternate Layers of Browns and Greens
Now, start layering your materials like a lasagna:
- Add browns – a few inches of dry leaves or shredded paper.
- Add greens – a thinner layer of kitchen scraps or grass clippings.
- Repeat – continue alternating layers until your bin is half full.
Each time you add fresh scraps, cover them with browns to reduce odors and deter flies. Maintaining that 2:1 brown-to-green ratio is key for efficient decomposition.
Step 3: Check Moisture — The “Wrung-Out Sponge” Test
Compost microbes need moisture to thrive, but too much water turns your pile slimy. Your compost should feel like a wrung-out sponge — damp but not dripping.
- Too dry? Add a few handfuls of greens or sprinkle with water.
- Too wet? Add extra browns and turn the pile to aerate it.
I keep a small watering can near my bin to adjust moisture easily — a small habit that makes a big difference in compost quality.
Step 4: Let Nature Take Over
After layering, cover the top with a final layer of browns. Over the next few weeks, the pile will start heating up — that’s the microbial activity doing its job. Within a month or two, you’ll see it shrink as materials break down.
For a visual walkthrough, the Compost Foundation’s beginner guide offers an excellent photo sequence of each step.
By following these steps, you’ve created the ideal environment for decomposition — your very own ecosystem of worms, fungi, and bacteria working in harmony.
Caring for Your Compost: Turning, Moisture & Odor Fixes
Once your compost bin is set up, the next step is nurturing it — just like tending a garden. Composting is mostly hands-off, but a little care goes a long way. Turning, checking moisture, and solving small issues will keep your backyard composting system healthy and efficient.
Turning Schedule and Tools
Turning your compost adds oxygen, which speeds up decomposition and prevents bad smells. Microbes that thrive in oxygen-rich environments (aerobic bacteria) are responsible for the earthy scent of good compost.
Here’s a simple schedule:
- Turn every 1–2 weeks using a garden fork or compost aerator.
- Mix the outer, drier material into the center, where the heat is highest.
- If you’re using a tumbler, just rotate it a few times every couple of days.
I used to forget to turn my pile, but after adding a reminder on my phone, the results improved dramatically. Within three months, I had dark, crumbly compost ready for the garden.
Odor Troubleshooting
A healthy compost pile should smell earthy — never sour or rotten. If you notice a bad odor:
- Smells like ammonia: too many greens. Add browns (dry leaves, paper).
- Smells rotten or sulfurous: pile is too wet. Add browns and turn for aeration.
- No heat or slow breakdown: too dry or not enough greens. Add a small dose of nitrogen-rich material like grass or coffee grounds.
Think of smell as your compost’s way of talking to you — it’s always giving clues about what’s working.
Pests and Protection
Pests are rare if you maintain balance, but to be safe:
- Keep all food scraps buried under a brown layer.
- Use a secure lid or mesh covering to deter raccoons or rodents.
- Avoid meat, dairy, and oils, which attract unwanted visitors.
If fruit flies become a problem, add a thicker brown layer or cover your scraps with a bit of soil.
A great resource for troubleshooting is Cornell Waste Management Institute’s Composting Basics, which explains how to maintain optimal microbial activity year-round.
With these simple habits, your compost will thrive naturally — no smell, no mess, just rich soil in the making.
How to Start a Compost Bin in Small Spaces & Cold Climates
Not everyone has a big backyard or ideal weather, but that doesn’t mean composting is out of reach. Whether you live in an apartment or deal with freezing winters, you can still learn how to start a compost bin and make it work year-round. I’ve lived in a small city apartment and later in a snowy region — and both setups worked beautifully once I adapted the system.
Compact Options for Small Spaces
If you don’t have room for a full backyard setup, try one of these compact composting methods:
- Bokashi composting: This Japanese method uses a special bran inoculated with microbes to ferment food scraps in an airtight container. It’s odor-free and perfect for indoor use.
- Vermicomposting (worm bin): Red wigglers break down kitchen waste quickly in a small bin. You can keep it under the sink or on a balcony.
- Mini compost tumblers: Small, sealed tumblers are great for patios or balconies and require minimal effort.
Each of these methods is a low-mess, beginner-friendly way to produce compost even in tight spaces. The USDA’s indoor composting guide explains how to manage worms, moisture, and temperature safely.
Winter Strategies for Cold Climates
Cold weather slows down microbial activity, but it doesn’t stop composting — it just pauses it. Here’s how to keep your compost active through winter:
- Insulate the bin with straw bales or thick layers of leaves.
- Stockpile browns (dry leaves, shredded cardboard) in fall to use when greens are scarce.
- Keep adding scraps: Even if decomposition slows, materials will break down once temperatures rise.
- Use a closed tumbler or insulated bin to retain heat and moisture.
I used to think my compost pile was “dead” in winter until spring came — and I discovered it steaming and alive again. Composting is resilient, even in harsh conditions.
Community and Municipal Composting
If space or climate truly make home composting difficult, check if your city offers drop-off composting programs. Many municipalities and community gardens accept food scraps and yard waste. Apps like ShareWaste also connect you with neighbors who compost.
Even if your pile is small or seasonal, every banana peel you divert from the landfill makes a difference.
When Is Compost Ready & How to Use It
After months of careful layering, turning, and patience, you’ll finally reach the most satisfying part of learning how to start a compost bin — using your finished compost. This is when all your effort pays off with dark, crumbly, nutrient-rich material your plants will love.
Signs of Finished Compost
You’ll know your compost is ready when it:
- Looks dark brown or black and crumbly.
- Smells earthy and fresh, not sour or rotten.
- Feels cool to the touch — active compost is warm, but finished compost has stabilized.
- Contains no recognizable scraps, just uniform organic matter.
If you’re unsure, do the “bag test”: place a small handful of compost in a sealed plastic bag for a few days. If it smells clean afterward, it’s ready to use.
Screening and Curing
Even mature compost can have small twigs or stubborn bits that didn’t break down. Use a ½-inch mesh screen to sift out larger pieces. You can return those to the next compost batch as a “starter,” rich in microbes.
For best results, let your finished compost cure for two to four weeks in a dry, shaded area. This final resting phase allows microbes to settle and ensures the compost is stable for planting.
Garden Uses for Compost
Finished compost is versatile and can be used throughout your garden:
- Soil amendment: Mix it into garden beds or potting soil to improve texture and fertility.
- Mulch: Spread a 1–2 inch layer around plants to retain moisture and suppress weeds.
- Compost tea: Steep a small amount in water for a gentle, nutrient-rich liquid fertilizer.
I remember spreading my first batch of compost over my vegetable beds — the soil transformed almost instantly, and within weeks, my tomato plants were thriving. It’s a real reminder that composting closes the loop between kitchen and garden.
Compost pairs perfectly with low-water landscaping. Discover how in Xeriscaping Ideas: Low-Water Gardening Tips for Drought-Proof Yards.
Conclusion
When I first learned how to start a compost bin, I had no idea it would become such a satisfying habit. What began as an experiment to reduce food waste quickly turned into a cornerstone of my gardening routine — a small but powerful act of sustainability. Composting connects you to the natural cycle of growth and renewal, and the payoff is both visible and rewarding.
Quick Start Checklist
Here’s a simple summary to get you going right away:
✅ Choose your compost setup — bin, tumbler, or open pile.
✅ Layer browns (dry leaves, paper) and greens (scraps, clippings).
✅ Keep moisture like a wrung-out sponge.
✅ Turn every week or two to add oxygen.
✅ Avoid meat, dairy, and oily foods.
✅ Watch for that earthy smell and dark, crumbly texture — signs it’s working!
Remember, composting isn’t about perfection. Even if you make a few mistakes, nature always finds a way to correct itself. The key is consistency — feeding your bin regularly, keeping balance, and letting time and microbes do their work.
If you’re ready to take the next step, grab a small bin, collect your first batch of kitchen scraps, and start today. Within months, you’ll have a nutrient-rich compost that your garden — and the planet — will thank you for.
For more guides and eco-friendly living tips, explore HomelyHaven’s sustainability section — and join a growing community of people turning everyday habits into greener homes. 🌱
Alex is the creator of Homely Haven, a space dedicated to simple, stylish ideas for interiors and gardens alike. With a passion for cozy living rooms, inviting outdoor spaces, and practical DIY solutions, Alex shares tips and guides that help turn any house into a true home.
From budget-friendly decorating hacks to weekend garden projects, the goal is always the same: to inspire you to create spaces that feel personal, beautiful, and welcoming. When not writing, Alex is usually rearranging furniture, sketching new garden layouts, or exploring design trends for the next project.