You’ve probably been eyeing those perfectly neat wooden boxes bursting with tomatoes, herbs, or flowers on Pinterest or in your neighbour’s garden. They look simple. Tidy. Manageable. And now you’re thinking, “Could I do that too?” You want to grow your own food or add some life to your garden — but between the building, the soil talk, and the planting guides, your head’s spinning.
You’re not alone. Most people who start with raised beds feel this exact mix of curiosity and confusion. The good news? Raised bed gardening is one of the easiest and most rewarding ways to dip your toe into growing things — even if you’ve never held a drill or planted a seed before. That’s why raised bed gardening for beginners is often the best way to start.
I’ve built raised beds in tiny urban spaces and big backyards. I’ve trialled cheap DIY builds and splurged on kits. I’ve filled them wrong, learned why drainage matters, and planted way too many courgettes more than once. So if you want advice from someone who’s been there, made the mistakes, and figured out what actually works — you’re in the right place.
By the end of this blog, you’ll know exactly how to build a raised bed, what to fill it with, and what to plant so you can actually see results — without wasting time, money, or motivation.
Ready to get started? Let’s break it down.
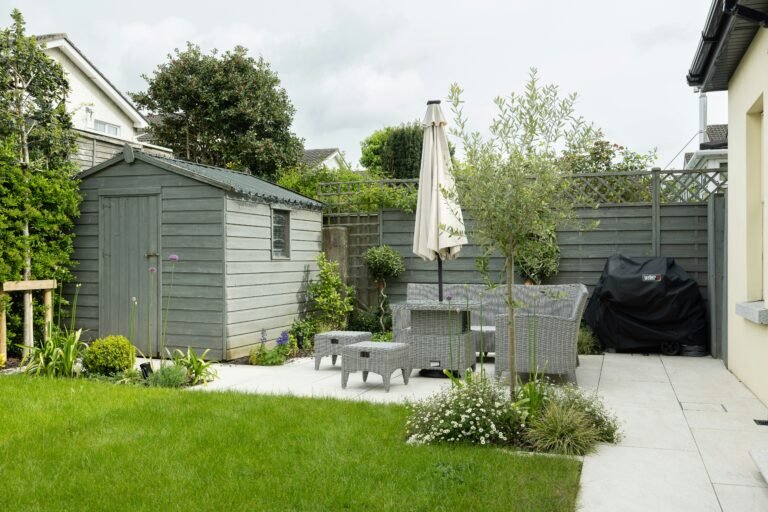
What Is a Raised Bed Gardening and Why Use It?
At its simplest, a raised bed is a garden bed that’s lifted above ground level, usually framed by wood, metal, stone, or even repurposed materials. Instead of planting straight into your existing soil, you create a contained box and fill it with your own growing mix. According to the University of Minnesota Extension’s guide on raised bed gardening, this method is especially effective in areas with poor or compacted soil.
Why bother with the extra effort?
Because raised beds solve a lot of the common problems gardeners face — especially if you’re just starting out.
1. Better Soil Control
If your ground soil is full of clay, sand, or just plain rubbish, you’re not stuck with it. A raised bed lets you start fresh with the perfect mix of compost, topsoil, and organic matter — giving your plants a better shot from day one. This is one of the main reasons raised bed gardening is so effective for beginners.
2. Fewer Weeds
Since you’re adding fresh soil to a new space, you’ll naturally have fewer weeds to deal with. And with everything in a confined area, it’s easier to spot and pull them early.
3. Improved Drainage
Raised beds drain better than in-ground gardens, which means your plants are less likely to suffer from root rot. This is especially useful if you’re in a rainy climate or have heavy soil.
4. Easier on Your Body
You don’t need to bend over as far to weed, water, or harvest. You can even build your beds high enough to garden while standing — a game changer if you’ve got back or knee issues.
5. Perfect for Small Spaces
Only got a patio or a patch of yard? Raised beds give you a compact, controlled space to grow more in less room. You’ll be surprised how much you can pack into even a small box.
In short, raised beds take a lot of the frustration out of gardening — and replace it with structure, simplicity, and real results. Next, let’s look at how to plan your own.
Raised Bed Gardening: Planning Your Space
Before you start building anything or buying soil, take a moment to plan. A little thought upfront will save you time, money, and frustration down the line. The Royal Horticultural Society also recommends careful planning to ensure raised beds receive enough sunlight and water access. Here’s what to consider.
1. Choose the Right Location
Plants love sunlight. Most vegetables and herbs need at least 6 hours of direct sun a day, ideally more. So your first step? Walk your garden or patio and watch how the light moves. Pick the sunniest spot you’ve got. Choosing the right location is a crucial first step in raised bed gardening. In my first raised bed, I placed it too close to a shady fence. Lesson learned: sun matters more than I realised.
Also think about:
- Access to water – You’ll need to water regularly, so the closer to a hose or tap, the better.
- Level ground – It’s easier to build on flat terrain. If it’s sloped, you may need to level the area first.
- Drainage – Avoid soggy areas where water collects.
2. Pick Your Size
Start with what’s manageable. A good beginner size is 4ft wide by 8ft long, but you can go smaller if space is tight. Just make sure the width doesn’t go beyond 4ft — that way, you can reach the middle from either side without stepping in the bed.
Some handy size tips:
- Depth: Aim for at least 6–12 inches of soil. Deeper is better for root veg like carrots or parsnips.
- Height: If you want to reduce bending, you can go up to 2 feet tall or even more, but you’ll need more soil to fill it.
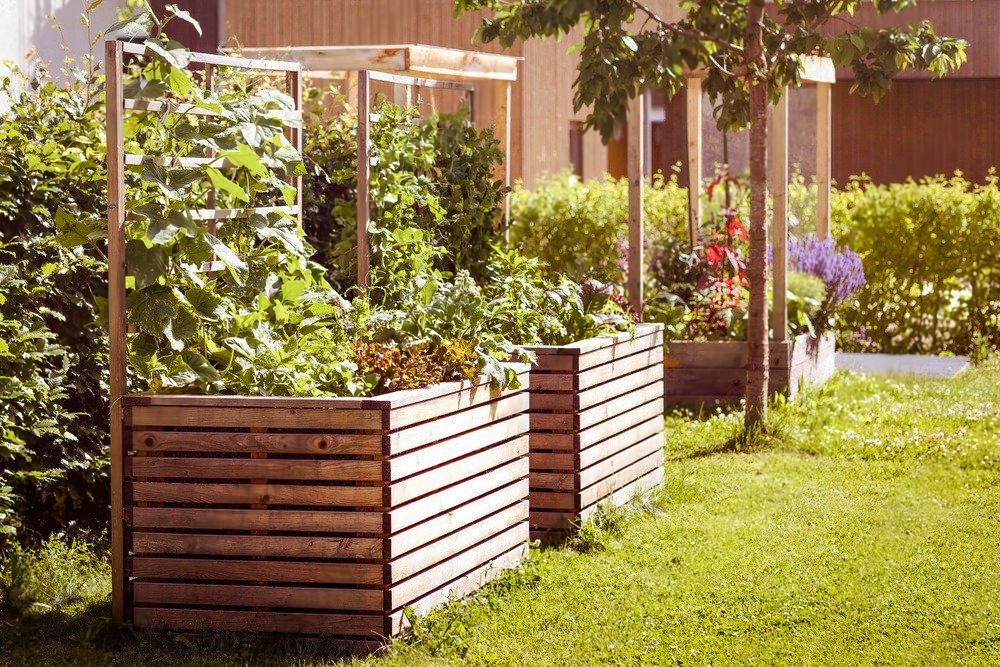
3. Choose Your Material
Here are your main options, with pros and cons:
- Wood: Classic, easy to find, and relatively cheap. Go for rot-resistant types like cedar or larch. Avoid pressure-treated timber unless it’s rated safe for gardens.
- Metal: Sleek and modern-looking. Won’t rot, but may heat up in full sun.
- Stone or Brick: Very durable and attractive, but more work to install.
- Recycled Materials: Pallets, corrugated metal, or even old bathtubs — just make sure they’re safe and non-toxic.
If you’re not handy, you can also buy raised bed kits that snap together. More on that in the next section.
Once you’ve picked your spot, chosen your size, and settled on materials, you’re ready to build.
How to Build a Raised Garden Bed (DIY & Kit Options)
You don’t need to be a DIY expert to build a raised bed. In fact, if you can measure, cut (or have it cut for you), and screw some boards together, you’re already there. Let’s walk through two main options: DIY from scratch and buying a kit.
Option 1: DIY Wooden Raised Bed (Basic Version)
What you’ll need:
- 4 wooden boards (e.g. two 4ft and two 8ft lengths)
- Galvanised screws or decking screws
- A power drill or screwdriver
- A level (optional, but helpful)
- Corner stakes (optional for stability)
Step-by-step:
- Lay out your boards in a rectangle on flat ground.
- Drill pilot holes to prevent wood from splitting, then screw the corners together.
- If you’re using corner stakes, fix them inside each corner for added support.
- Use a level to make sure it sits evenly — especially if you’re on slightly sloped ground.
- Place your bed in its final position before filling it — it’s heavy once full.
That’s it. Super simple. You can line the bottom with cardboard to smother grass and weeds — it’ll break down naturally and feed the soil. Many people start raised bed gardening with simple DIY wooden frames because they’re affordable and easy to build. When I built my first DIY wooden raised garden bed, I used the cheapest pine boards I could find. They rotted within two years. Switching to cedar made a huge difference.
Option 2: Raised Bed Kit
If DIY’s not your thing, raised bed kits make life easy. They come with pre-cut materials and instructions — sometimes even tool-free assembly. These are great if:
- You want a tidy, uniform look
- You don’t have tools
- You’re short on time
Just make sure the kit is made from durable, non-toxic materials, and that it fits your planned space and depth needs.
Want to Get Fancy?
You can add extras like:
- Built-in trellises for climbing plants
- Cold frames or covers to extend your growing season
- Benches around the sides for seating and storage
But honestly? Don’t overcomplicate your first one. Keep it simple, get growing, and build from there.
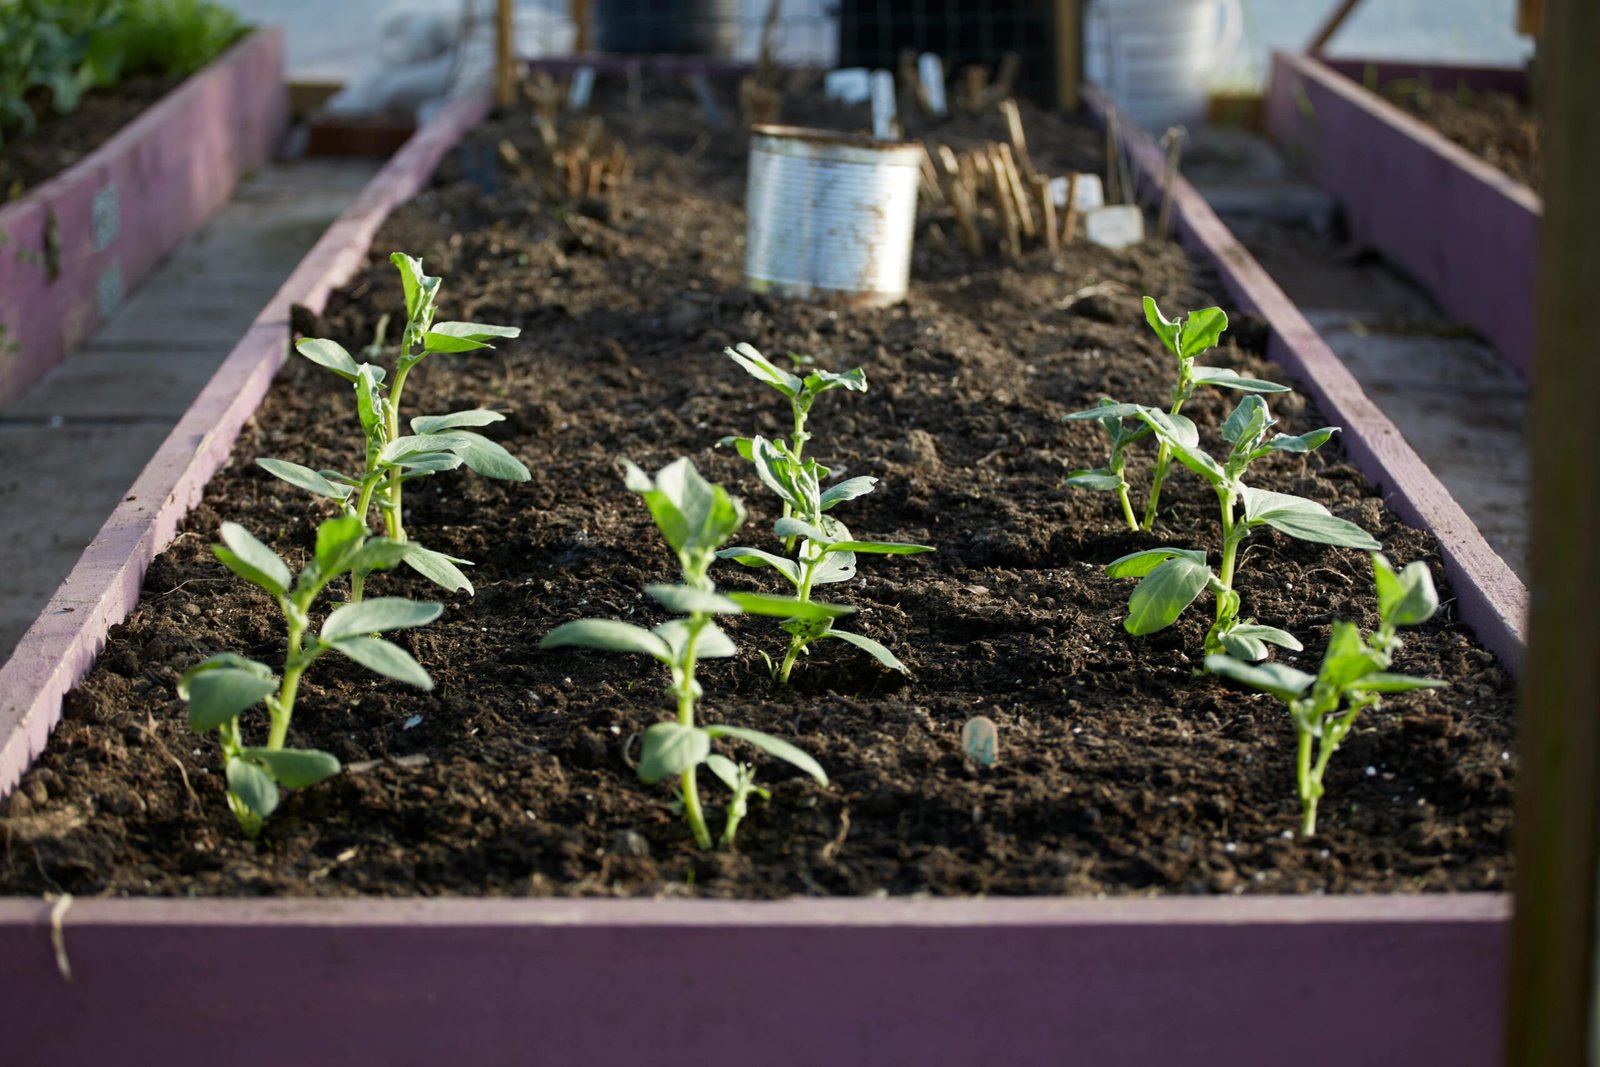
The Ideal Raised Bed Soil Mix
You’ve built your raised bed — now it’s time to fill it. This is where the magic happens. The quality of your soil mix will make or break your garden, so don’t just shovel in any old dirt and hope for the best.
Here’s how to do it right.
What Not to Use
Let’s get this out of the way first:
- Don’t use just soil from your garden — it’s often too heavy, poorly draining, and may contain pests or weed seeds.
- Don’t fill the bottom with rocks or gravel. That old myth about “helping drainage” has been debunked — it can actually make things worse.
The Ideal Raised Bed Mix
Aim for a loose, rich mix that holds moisture but drains well. A basic formula is:
40% topsoil
40% compost
20% aerators (like perlite, vermiculite, or coarse sand)
The soil mix is the heart of successful raised bed gardening, so getting it right from the start is essential. According to NC State Extension, using a balanced mix such as 40% compost, 40% topsoil, and 20% aeration material is the foundation of healthy raised bed performance. I once filled my bed with heavy garden soil, and it compacted so badly my carrots forked. Switching to a lighter raised bed soil mix fixed everything.
You can also use the popular “Mel’s Mix” from Square Foot Gardening:
1/3 compost + 1/3 peat moss (or coco coir) + 1/3 vermiculite
This gives great results, especially in smaller beds. If you go this route, try to use multiple sources of compost (e.g. mushroom, green waste, worm castings) to balance nutrients.
Layering Options (Lasagne Style)
If your bed is deep and you want to save money on filling it, you can use a layered approach:
- Bottom layer – Organic matter like sticks, branches, or even logs (this is called hugelkultur).
- Middle layer – Grass clippings, leaves, or partially rotted compost.
- Top 12–18 inches – High-quality soil mix (as above).
The bottom layers will break down over time and feed your plants — just make sure they’re fully covered so you’re not planting straight into sticks.
Topping It Off
Lightly water the bed once filled, then let it settle for a day or two. You may need to top it off again before planting. If the soil feels too dry or too dense, mix in a bit more compost or aerator. Once your bed is filled and settled, keep the soil rich and productive with natural feeds. Explore Best Organic Fertilizers for Thriving Veggies and Flowers to learn which organic nutrients will help your raised bed plants flourish all season.
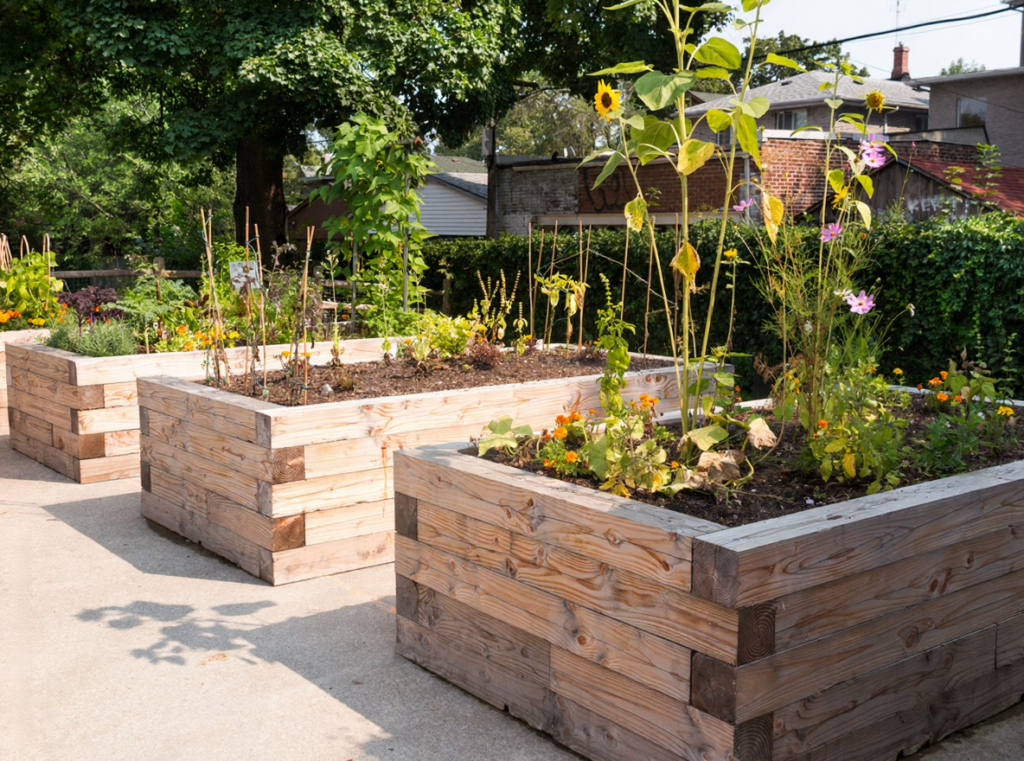
Best Plants for Raised Beds (Beginner-Friendly Choices)
You’ve built it. You’ve filled it. Now for the fun part: planting. If you’re looking for the best plants for raised beds, start simple with fast-growing crops and herbs. What you grow depends on your goals, your climate, and your bed’s sun exposure — but if you’re just starting out, the key is to start simple and aim for quick wins.
Best Plants for Beginners
One of the joys of raised bed gardening is how quickly you see results, especially with beginner-friendly plants. These crops are forgiving, fast-growing, and don’t demand much fuss:
🌿 Herbs
- Basil, chives, parsley, coriander, mint
Great for small spaces, quick to grow, and ideal for cooking. Just keep mint in its own pot or it’ll take over.
🥬 Leafy greens
- Lettuce, spinach, rocket, kale
Fast-growing, can be harvested leaf-by-leaf, and do well even in partial sun.
🥕 Root vegetables
- Radishes, carrots, beetroot
Radishes are super speedy (you’ll see results in a few weeks). Carrots need deeper beds and loose soil.
🍅 Veggies
- Tomatoes, courgettes, cucumbers, beans
Tomatoes and courgettes are raised bed stars — just give them space and sun. Beans grow fast and high, great with a trellis.
What Not to Start With (Yet)
- Brassicas (like broccoli or cauliflower) – they take ages and attract pests
- Sweetcorn – needs lots of room and doesn’t yield much in small beds
- Potatoes – better in bags or deeper containers
Companion Planting Tips
Mixing the right plants together can boost growth and help with pests:
- Tomatoes + basil = tastier tomatoes
- Carrots + spring onions = carrots repel onion flies, onions repel carrot flies
- Lettuce + radishes = radishes break up soil, lettuce benefits
Plan Before You Plant
Don’t overcrowd. Each plant needs space — check your seed packet or label for spacing. Raised beds make it tempting to cram things in, but overcrowding means poor airflow, stunted growth, and more pests A simple way to plan is to divide your bed into square foot sections, giving each plant its own mini-zone. It’s tidy, efficient, and helps keep things under control.
Not sure when to plant everything in your new raised bed? Use our Seasonal Planting Calendar: 12 Tips for Successful Gardening Each Month in the USA to time your sowing perfectly for every season.
Caring for Your Bed
Now that your raised bed is planted, it’s all about keeping things alive and thriving. Don’t worry — this doesn’t mean hours of daily maintenance. With just a few habits, your garden will mostly take care of itself.
1. Watering
Watering is one of the few things you’ll do more often with raised bed gardening compared to in-ground beds. Raised beds dry out faster than in-ground gardens, especially in warm weather. Here’s how to stay on top of it:
- Check daily in hot months, especially when plants are young.
- Water deeply but less often — this encourages roots to grow deeper.
- Water early morning or late evening to avoid evaporation.
- Use a soaker hose or drip system if you want to save time.
💡 Quick test: Stick your finger into the soil up to the second knuckle. If it feels dry at that depth, it’s time to water.
2. Feeding
If you started with a good compost-rich soil mix, your plants won’t need much early on. But over time, nutrients get used up.
- Add a light compost top-up every few weeks.
- For heavy feeders like tomatoes or courgettes, consider an organic liquid fertiliser mid-season.
3. Weeding
Raised beds = fewer weeds, but not zero. Catch them early:
- Pull any small weeds when you see them — it’s easy when the soil is loose.
- Mulch with straw, bark, or compost to suppress new weeds and retain moisture.
4. Supporting Your Plants
Tall or vining plants like tomatoes, beans, and cucumbers need support:
- Use stakes, trellises, or cages early on so you don’t disturb the roots later.
- Tie stems loosely with twine or plant clips.
5. Pest Management
Watch for signs like holes in leaves, discoloured patches, or slow growth. Some quick, low-effort strategies:
- Use netting to keep out birds and butterflies.
- Plant companion flowers like marigolds or nasturtiums to deter pests.
- Hand-pick slugs or caterpillars if they appear — or try natural deterrents like crushed eggshells or beer traps.
6. Seasonal Care
- Spring: Start fresh, prep soil, sow early crops.
- Summer: Water, harvest, and stay on top of growth.
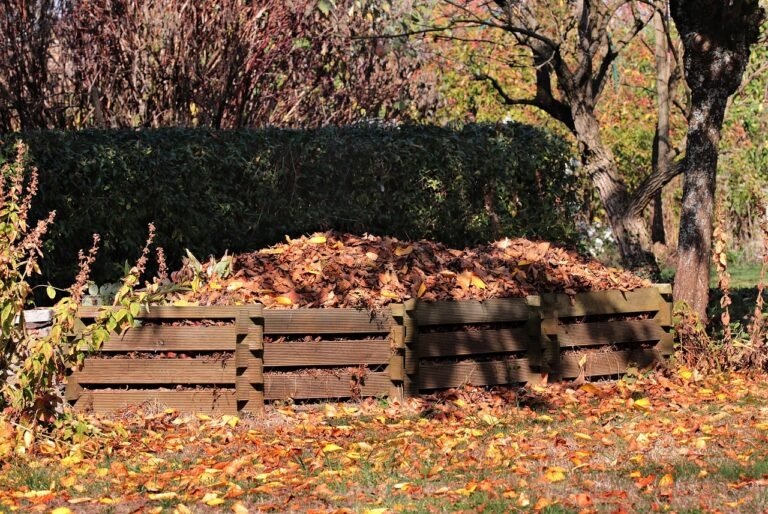
- Autumn: Pull spent plants, add compost, and maybe plant garlic or overwintering crops.
- Winter: Cover your bed with mulch or a frost cloth, or let it rest until spring.
Raised Bed Gardening Mistakes to Avoid
Even the most enthusiastic gardener can hit a few snags. Luckily, most raised bed mistakes are easy to dodge — especially if you know what to look out for.
1. Using the Wrong Soil
Dumping in poor-quality soil or garden dirt is the quickest way to ruin your bed. Plants need loose, rich, well-draining soil. If it’s too heavy or compacted, roots can’t spread, and water can’t flow.
Fix: Always start with a good raised bed mix. If it’s too late, mix in compost and aerators to improve it over time.
2. Overcrowding Your Plants
Overcrowding is one of the biggest pitfalls in raised bed gardening, and it’s one of the easiest to avoid with proper spacing. We get it – it’s tempting to cram in as many seedlings as possible. But overcrowding leads to poor airflow, pest problems, and underperforming plants.
Fix: Follow spacing guidelines. If in doubt, give them more room than less.
3. Not Planning for Drainage
If your bed sits in a low, soggy spot or doesn’t drain well, you’ll end up with waterlogged roots and sad plants.
Fix: Make sure your bed is level and in a spot that doesn’t collect water. Use well-draining soil and avoid sealing the bottom — raised beds need to drain freely.
4. Ignoring Sunlight
Planting full-sun crops like tomatoes in a shady corner will leave you disappointed.
Fix: Before you build or plant, spend a day watching where the sun hits your garden. Choose the sunniest spot available for fruiting plants.
5. Neglecting Maintenance
Even low-maintenance beds need occasional care — watering, feeding, and the odd weed pull.
Fix: Set a simple weekly routine. Check your bed, water when needed, and keep an eye out for problems before they grow.
6. Building Too Big
It’s easy to get carried away with a huge bed that’s hard to manage, hard to reach, and expensive to fill.
Fix: Start with one small or medium bed. You can always expand later once you’ve got the hang of it.
Final Thoughts
Starting a raised bed garden might seem like a lot at first — picking the right spot, building the frame, filling it, planting, watering… but once you get stuck in, you’ll wonder why you didn’t do it sooner.
You don’t need to be a DIY expert, a green-thumbed veteran, or someone with a huge garden. Raised beds are flexible, forgiving, and perfect for growing real results — whether that’s crisp lettuces, juicy tomatoes, or a bunch of herbs to elevate dinner.
The key is to start small, keep it simple, and enjoy the process. Your first season will teach you more than any guide ever could but now, you’ve got a solid foundation to build on (literally and figuratively). Your first season of raised bed gardening for beginners will teach you more than any guide and set you up for long-term success.
Raised bed gardening for beginners taught me more in one season than years of reading guides, simply because I learned by doing. So go on, pick a weekend, grab some wood or a kit, and build your first bed. Your future self – with a basket full of homegrown food – will thank you.
FAQ: Raised Bed Gardening 101
Alex is the creator of Homely Haven, a space dedicated to simple, stylish ideas for interiors and gardens alike. With a passion for cozy living rooms, inviting outdoor spaces, and practical DIY solutions, Alex shares tips and guides that help turn any house into a true home.
From budget-friendly decorating hacks to weekend garden projects, the goal is always the same: to inspire you to create spaces that feel personal, beautiful, and welcoming. When not writing, Alex is usually rearranging furniture, sketching new garden layouts, or exploring design trends for the next project.