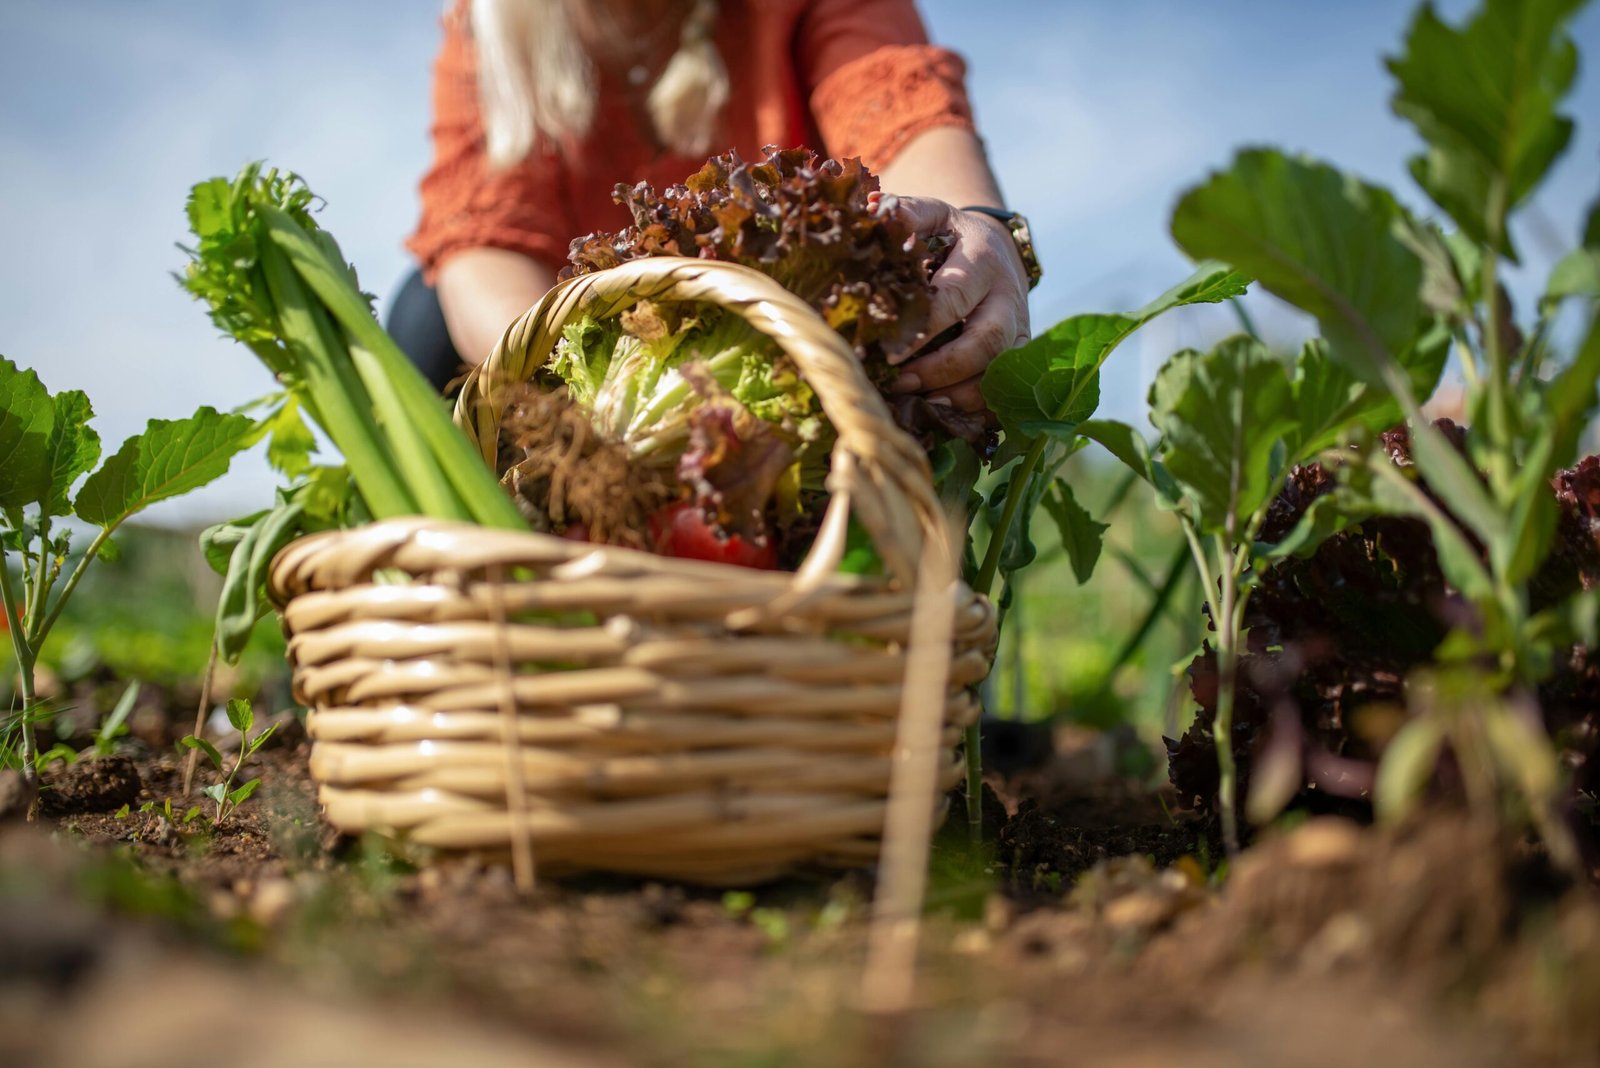
You’ve spent months planting, watering, weeding—and now, suddenly, everything’s ready. Tomatoes are ripening faster than you can eat them, courgettes are multiplying overnight, and your herb garden looks like it’s staging a takeover. Learning the best ways of harvesting and preserving garden produce means you’ll enjoy fresher meals, reduce waste, and make the most of your homegrown food.
At first, it felt amazing. Now? You’re staring at a kitchen full of produce, wondering, “What on earth do I do with all of this?” In my own balcony garden, I once had too many tomatoes ripening at once, and I remember feeling exactly the same way – excited but overwhelmed.
You’re not alone. This is the exact moment when a lot of home gardeners go from proud to panicked. You don’t want to waste a single bite, but you also don’t have time to spend days researching old-school preserving techniques or buying specialist gear.
Here’s the good news: you don’t need to. With a few smart strategies, you can keep your harvest fresher for longer, preserve the best of it for winter, and avoid common storage mistakes that lead to waste.
This guide will walk you through harvesting and preserving garden produce with methods that save time and reduce waste.
Harvest Smart: First Step in Harvesting and Preserving Garden Produce
How and when you harvest your produce makes a huge difference to how long it lasts. Pick too early and it won’t taste right. Pick too late and it’ll spoil faster. Here’s how to strike the right balance:
Know Your Timing
Each fruit or veg has a “sweet spot” for harvesting:
- Tomatoes: Pick when fully coloured and slightly soft to the touch. Leave them on the vine to ripen if they’re still pale.
- Courgettes: Harvest when they’re small (15–20cm). Bigger ones might seem like a bonus, but they don’t last as long and lose flavour. When I harvest my courgettes early, I notice they last much longer in storage, and their flavour is far better compared to oversized ones.
- Herbs: Snip just before flowering for the best oils and flavour. Morning is ideal, after the dew has dried but before the sun gets too hot.
Use the Right Tools
Always cut with clean, sharp scissors or secateurs rather than pulling or twisting. This reduces bruising and helps the plant recover quicker (and keeps producing).
Handle with Care
Think of your harvest like ripe peaches—even if it’s a spud. Bruises shorten shelf life dramatically. Line baskets or boxes with a towel, avoid overloading, and don’t leave produce baking in the sun after picking.
Don’t Wash (Yet)
It’s tempting to give everything a rinse right away—but resist. Moisture speeds up rot. Brush off dirt, sort your haul, and only wash produce just before storing or using.
Getting this stage right is the foundation of harvesting and preserving garden produce effectively.
Once you’ve mastered harvesting, it’s time to give back to your soil. Explore Best Organic Fertilizers for Thriving Veggies and Flowers to naturally replenish nutrients for next season’s crops.
Sorting Your Haul: What’s Worth Storing, What to Eat Now
Not everything in your basket is a good candidate for long-term storage—and that’s okay. The key is to be selective so you’re not wasting effort (or space) on produce that’s already on its way out.
Eat These First
Some crops are best eaten fresh or don’t keep well:
- Berries: Fragile and short-lived. Eat, freeze, or preserve them ASAP.
- Leafy greens: Spinach, lettuce, and rocket wilt quickly—use within days or freeze in portions for cooking.
- Overripe veg: If it’s already soft or bruised, plan to eat or cook it within a day or two.
Store These
Choose produce that’s firm, unblemished, and freshly picked. These are your best bets for storage:
- Root veg (like carrots and beetroot): Last well when stored in cool, dark places.
- Onions and garlic: Cure them first (more on that later), then store in a dry, ventilated spot.
- Apples and pears: Last for weeks to months in the right conditions.
The Golden Rule: Check Everything
Sort produce like you would eggs—one bad one spoils the bunch. Remove anything with soft spots, signs of mould, or insect damage. They’ll accelerate the decay of everything around them. Sorting carefully is one of the overlooked steps in harvesting and preserving garden produce.
Pro tip: Make a plan
Once you’ve sorted your haul, group it by how quickly it needs to be used. A simple three-pile system—eat now, store short-term, and preserve—helps you stay on top of things and avoid waste.
Short-Term Storage Tips for Harvesting and Preserving Garden Produce
Sometimes, all you need is a bit of smart storage to stretch your harvest by days or even weeks. The trick is knowing what goes where—and why.

The Fridge: Not Always Your Friend
The fridge seems like the obvious answer, but not all produce likes the cold.
Store in the fridge:
- Leafy greens: Wrap in a damp paper towel and store in a resealable bag or container.
- Carrots, radishes, and beetroot: Trim the tops, keep in breathable bags, and they’ll stay crisp for weeks. I keep my carrots in breathable bags in the fridge, and they stay crisp for weeks, sometimes even longer than store-bought ones.
- Berries: Store unwashed in a single layer with a paper towel to absorb moisture.
Keep out of the fridge:
- Tomatoes: Fridge ruins the texture. Store at room temperature away from direct sunlight.
- Potatoes: Go grainy in the fridge. Keep in a paper bag in a cool, dark place.
- Onions and garlic: Prefer dry, ventilated spots like mesh bags in a pantry.
The USDA provides detailed guidelines on storing fresh produce that confirm how much proper ventilation and moisture control extend shelf life.
Countertop and Pantry Storage
Some produce just needs the right environment:
- Apples and pears: Store in a cool, dark cupboard if possible.
- Herbs: Keep soft herbs (like parsley or coriander) in a glass of water, like cut flowers. Hard herbs (like rosemary or thyme) can be wrapped in a damp towel in the fridge.
Good airflow and correct temperatures are vital for harvesting and preserving garden produce successfully.
Small Tweaks, Big Gains
- Don’t overcrowd drawers: Airflow matters.
- Use breathable storage: Paper or mesh bags over plastic.
- Keep ethylene producers (like apples and bananas) away from sensitive veg—they’ll speed up ripening and spoilage.
Freezing Vegetables and Herbs: A Key Part of Harvesting and Preserving Garden Produce
Freezing is one of the easiest ways to preserve your harvest. No fancy gear, minimal effort—and you can dip into it all winter long. The key is prepping your produce properly before it hits the freezer.
What Freezes Well
Some crops handle freezing like champs:
- Tomatoes: Chop or blitz into a sauce—freeze in portions.
- Courgettes: Grate, squeeze out moisture, and freeze in bags for soups or baking.
- Green beans, peas, broccoli: Blanch briefly in boiling water, cool in ice water, then freeze.
- Herbs: Chop and freeze in ice cube trays with olive oil or water. I love freezing chopped herbs in olive oil cubes – it makes winter cooking so much easier, because I can just pop one straight into a pan.
The Prep Matters
Here’s how to freeze smart:
- Blanching: A quick boil (30 seconds to 3 minutes) stops enzymes that cause spoilage. It’s a step worth taking for most veg. According to the University of Minnesota Extension’s freezing guide, blanching is essential to preserve both flavor and nutrients in vegetables.
- Dry thoroughly: Water leads to freezer burn. After blanching and cooling, dry everything before packing.
- Use proper containers: Ziplock bags, rigid plastic tubs, or silicone trays work best. Label everything with name and date.
Freezing is one of the simplest techniques in harvesting and preserving garden produce for winter meals.
Avoid Freezer Fails
- Don’t freeze overripe or bruised produce—it only gets worse when thawed.
- Don’t overload your freezer at once. Freeze in batches to keep the temperature stable.
- Avoid freezing high-water-content veg like lettuce or cucumber—they’ll come out mushy.
By freezing in small batches, you avoid spoilage and extend your success in harvesting and preserving garden produce.
Drying and Dehydrating: Classic Method for Harvesting and Preserving Garden Produce
Drying is an age-old way to preserve food, and for good reason: it’s simple, space-saving, and great for boosting flavour. You don’t need a dehydrator to get started—just patience and a warm, dry space.
Drying Herbs
Drying intensifies flavour, especially for hardy herbs.
How to do it:
- Tie herbs (like rosemary, thyme, oregano) into small bundles and hang upside down in a dry, well-ventilated room.
- Alternatively, lay leaves flat on a screen or baking paper out of direct sun.
- Once crumbly, store in airtight jars or containers. Label with the name and harvest date.
Soft herbs (like basil or parsley) don’t air-dry well. Freeze or use a low oven/dehydrator instead.
Tomatoes and Fruit
Tomatoes and fruit like apples, plums, and strawberries are perfect for drying.
Oven method:
- Slice thinly and spread in a single layer on baking trays.
- Set oven to its lowest temperature (around 60–90°C).
- Keep the door slightly open to let moisture escape.
- Check every hour—drying can take 4–8 hours depending on the moisture content.
Dehydrator method:
- If you have one, follow the manual’s temperature and time guides.
- It’s more efficient and offers more consistent results.
Storage Tips
- Once dried, let everything cool completely before storing.
- Use airtight containers or vacuum-seal bags.
- Store in a cool, dark place and check for moisture or mould after the first week.
Drying is not just an old-fashioned practice, it’s still one of the most reliable ways of harvesting and preserving garden produce.
Pickling and Fermenting: Simple Methods, Minimal Equipment
Pickling and fermenting aren’t just for hardcore homesteaders. They’re surprisingly easy, don’t require fancy gear, and can turn your extra veg into flavour-packed staples.

Quick Pickles (Refrigerator Pickles)
Great for cucumbers, carrots, onions, and radishes. No canning needed.
Basic method:
- Slice your veg evenly.
- Pack into clean jars.
- Heat a brine (equal parts vinegar and water, plus salt and sugar to taste).
- Pour the hot brine over the veg.
- Let cool, then store in the fridge. Ready in 24–48 hours.
Flavour it up with garlic, dill, mustard seeds, or chilli flakes. Lasts up to a month in the fridge.
Fermenting for Beginners
Fermentation is all about letting beneficial bacteria do the work—no vinegar needed.
Perfect for: Cabbage (sauerkraut), carrots, green beans, and even garlic.
Simple sauerkraut method:
- Shred cabbage and massage with salt until it releases liquid.
- Pack tightly into a jar, pressing down to submerge the cabbage in its brine.
- Cover loosely and let it sit at room temperature (out of direct light).
- Taste after 5–7 days—when you like the flavour, refrigerate it.
Safety Tip
Always keep veg submerged in liquid—whether vinegar or natural brine—to avoid mould. If anything smells genuinely off, toss it.
Pickling and fermenting remain flavorful traditions in harvesting and preserving garden produce.
Canning for Beginners: Is It Worth It? What You Need to Know
Canning sounds intimidating, but it’s really just about creating a vacuum seal to keep food shelf-stable. It’s not for everything—but if you’ve got gluts of tomatoes, fruit, or chutney ingredients, it might be worth the effort.
When Canning Makes Sense
Ideal for:
- Tomato sauces and passata
- Jams, jellies, and fruit preserves
- Pickles and relishes
Skip canning for:
- Leafy greens
- Low-acid foods like plain veg or meat (unless using a pressure canner)
What You’ll Need
You don’t need a huge setup:
- Glass jars with two-part lids (new lids each time)
- A deep pot with a rack (or folded towel at the bottom)
- Tongs or a jar lifter
- A funnel and ladle help, too
Water Bath Canning Basics
- Fill sterilised jars with hot food, leaving headspace.
- Wipe rims clean and apply lids.
- Submerge jars in boiling water for the recommended time (depends on recipe).
- Remove, let cool, and check the seal (the lid should pop down and not move).
- Label and store in a cool, dark place.
Play It Safe
Only use trusted recipes from reliable sources. Poor technique or bad ratios can lead to dangerous spoilage, including botulism in low-acid foods. If in doubt—freeze it instead. The National Center for Home Food Preservation is an excellent resource for safe, research-tested canning and preservation methods.
Canning is more advanced, but it’s a rewarding method for harvesting and preserving garden produce safely.
Common Mistakes to Avoid: Spoilage, Poor Labelling, Wrong Containers
You’ve done the hard work—now don’t let a few simple missteps ruin your efforts. These common mistakes can quickly undo good preserving.
Using the Wrong Containers
- Plastic takeaway tubs: Often crack in the freezer or aren’t airtight.
- Glass jars: Great—but only use ones designed for preserving. Not all glass can handle heat or pressure.
- Overfilled jars or bags: Leave headspace in the freezer and when canning—food expands.
Skipping the Labels
Labelling is essential when harvesting and preserving garden produce—otherwise you’ll forget what’s in storage.
Always include:
- What it is
- Date preserved
- Any notes (e.g., “blanched”, “spicy”, “eat by X”)
Storing Bad Produce
Rot spreads fast. Don’t try to “save” bruised or borderline fruit and veg in storage—it’ll take others down with it.
Forgetting to Rotate
Use older preserves first. Put new items behind or below older ones so you naturally use up the older stock first.
Not Controlling Moisture
Moisture is the enemy in storage—especially for dry goods. Use breathable materials where needed, and always dry produce thoroughly before preserving or storing.
Bonus Tips: Labelling, Storage Tracking, and Enjoying Your Preserves
You’ve sorted, stored, frozen, and pickled like a pro—now it’s time to keep your system running smoothly and actually enjoy what you’ve put away.
Labelling Done Right
A simple label makes your future self’s life easier.
- Use masking tape or freezer labels—easily removable.
- Write clearly with a waterproof pen.
- Include the full date (not just month/year).
- Add notes like “ready to eat” or “needs cooking.”
Simple Storage Tracking
You don’t need a spreadsheet (unless you love one)—just a notebook or phone note.
- List what you’ve stored and when.
- Tick off as you use items.
- Set reminders for anything nearing its “use by” window (especially fridge pickles or ferments).
Even after you’ve mastered harvesting and preserving garden produce, a good system of rotation keeps everything fresh.
Use It or Lose It
It’s easy to forget what you’ve got tucked away. Make it a habit to:
- Plan one “preserve-based” meal a week.
- Add freezer or pantry checks to your grocery list routine.
- Turn preserving into sharing—jams and pickles make great gifts.
By harvesting and preserving garden produce with care, you’ll enjoy your homegrown food for months after harvest. Looking back at last season, I enjoyed jars of dried tomatoes all winter thanks to these preserving steps, and it reminded me of summer every time I opened a jar.
And Finally… Celebrate It
Preserving isn’t just about saving food, it’s about extending the joy of your garden. Those frozen courgettes in January or dried tomatoes in March? That’s your summer, bottled. Enjoy it.
FAQ: Essential Tips for Successfully Harvesting and Preserving Garden Produce
Alex is the creator of Homely Haven, a space dedicated to simple, stylish ideas for interiors and gardens alike. With a passion for cozy living rooms, inviting outdoor spaces, and practical DIY solutions, Alex shares tips and guides that help turn any house into a true home.
From budget-friendly decorating hacks to weekend garden projects, the goal is always the same: to inspire you to create spaces that feel personal, beautiful, and welcoming. When not writing, Alex is usually rearranging furniture, sketching new garden layouts, or exploring design trends for the next project.