You’ve finally done it. You grew your own tomatoes, courgettes, maybe even a few sunflowers. The plants thrived, the harvest was satisfying, and now… well, now you’re eyeing those seed heads and dried pods wondering, Can I keep these and plant them again next year?
You’re not alone. If you’ve ever Googled “how to save seeds” and landed in a sea of confusing jargon about fermentation, drying times, and pollination types, you’re in the right place. When I first tried saving tomato seeds, I expected it to be complicated but it turned out much simpler than I thought. Seed saving for beginners doesn’t have to be complicated, this guide will show you simple ways to collect and store seeds for next season.
Here’s the good news: you can absolutely learn how to save your own seeds. You don’t need fancy gear. You don’t need a botany degree. You just need a little guidance — and that’s what this guide will give you.
In this article, you’ll learn which seeds are worth saving, how to collect them at the right time, and the best way to store them so they actually grow next season. You’ll avoid the rookie mistakes, and you’ll walk away feeling confident and inspired to start building your own personal seed library.
Why Seed Saving for Beginners is Worth It
Saving seeds might seem like a small act, but it’s packed with benefits that go beyond just growing your own food. Here’s why so many gardeners — from balcony beginners to full-blown homesteaders — are getting into it.
1. It saves you money
Buying seeds each season adds up. I remember realising that one single tomato plant gave me enough seeds for three summers. Once you start saving your own, you’re essentially creating a never-ending supply. One healthy plant can give you dozens, sometimes hundreds of seeds. That’s next year’s garden, sorted.
2. It builds resilience
Life’s unpredictable. Seed shortages happen. Maybe the variety you love sells out. Maybe delivery takes too long. By saving your own, you’re not relying on shops or stock levels. You’ve got your own supply, on your own terms.
3. It supports sustainability
Seed saving cuts down on packaging, shipping, and commercial production. And if you swap or share seeds locally, you’re helping build a stronger, more sustainable food network.
4. It helps plants adapt to your garden
When you save seeds from your best-performing plants — the ones that thrived in your soil, with your weather, and your care — you’re selecting for resilience. Over time, your garden will be full of plants that are perfectly adapted to your conditions.
5. It keeps tradition alive
There’s something deeply human about seed saving. It connects you to a long line of growers who did the same, passing down knowledge — and literal life — from one season to the next.
➡️ More on this topic: Top 10 Must-Have Herbs for an Easy Kitchen Herb Garden
Which Seeds Can You Save?
Not all seeds are created equal. Some will give you strong, healthy plants that grow just like their parent. Others… not so much. So before you start snipping pods and scraping out tomatoes, here’s what you need to know. If you’re new to gardening, this list shows the best crops for seed saving for beginners, easy plants that produce reliable results.
1. Start with open-pollinated or heirloom varieties
These are the seeds you want. Open-pollinated plants reproduce naturally — bees, wind, or even your watering can do the job. When you save seeds from these plants, the next generation will usually grow true to type — meaning they’ll be just like the parent plant.
You’ll often see the word “heirloom” on seed packets — these are open-pollinated varieties that have been handed down for generations. Perfect for saving.
2. Avoid hybrids (F1)
Hybrids are a cross between two different parent plants, bred for specific traits like bigger fruit or disease resistance (Royal Horticultural Society on F1 hybrids). That first generation (F1) might be brilliant — but the seeds it produces won’t be predictable. You could get something weaker, wildly different, or nothing at all. So if your seed packet says “F1”, skip saving those seeds.
3. Start with the easy ones
If you’re just getting started, these are some of the easiest and most reliable plants to save seeds from:
- Tomatoes – super productive, and seeds last years if stored properly.
- Peppers – another beginner-friendly option with minimal prep.
- Lettuce – just let it bolt (go to flower), then harvest the fluffy seed heads.
- Beans & Peas – just dry the pods and store the seeds inside.
- Sunflowers – once the flower head dries out, seeds are easy to remove and store.
4. Think about cross-pollination
Some plants can cross-pollinate with others nearby — especially things like squash, courgettes, and pumpkins. This means your saved seeds might not grow exactly like the parent plant unless you’ve controlled pollination (which is more advanced). Stick with self-pollinating plants like tomatoes, lettuce, and beans while you’re learning.
➡️ More on this topic: Companion Planting Guide: Best Plant Pairings for a Healthier Vegetable Garden
When and How to Collect Seeds
Timing is everything when it comes to collecting seeds. Harvest too early and they won’t be mature enough to grow. Leave them too long and they might rot, drop, or get eaten. The good news? With a bit of practice, you’ll start to recognise the sweet spot. The collecting stage is often where seed saving for beginners feels tricky, but these simple steps make it foolproof.
1. Let the plant finish its full cycle
This part’s simple but often skipped. You need to let the plant finish its natural life. That means letting the fruit ripen fully on the plant — even beyond the point when you’d normally pick it to eat.
Here’s how that looks with a few common plants:
- Tomatoes & peppers → Wait until the fruit is overripe.
- Beans & peas → Let the pods dry and rattle on the vine.
- Lettuce → Let it bolt and flower; seeds appear as fluffy tufts like dandelions.
- Cucumbers & courgettes → Leave them to grow big, yellow, and overripe.
- Sunflowers → Let the flower head brown and dry on the stalk.
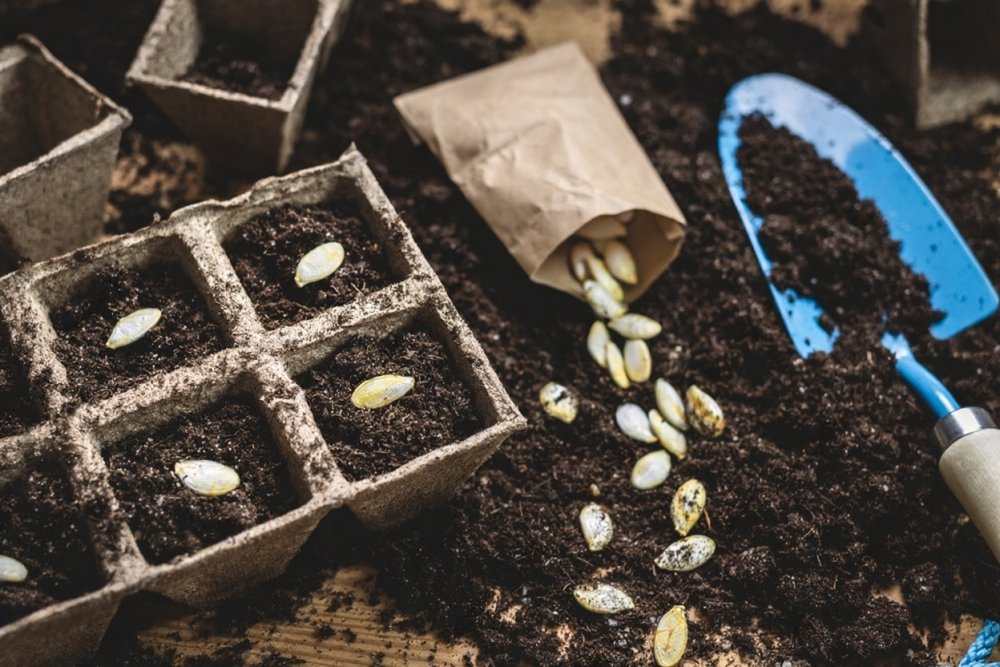
2. Seed Saving for Beginners: Step-by-Step Guide
For dry seed plants like beans, peas, lettuce, and sunflowers:
- Wait until the seeds or pods are fully dry on the plant.
- Collect them on a dry day to avoid mould.
- Gently break open pods or rub seed heads over a bowl to release the seeds.
- Remove any bits of pod or plant debris.
For wet seed plants like tomatoes, cucumbers, and squashes:
- Scoop out the seeds into a container.
- Rinse away pulp with water.
- Some seeds (like tomatoes) benefit from fermentation — leave them in water for 1–2 days to separate good seeds from bad and to kill off diseases.
- Dry the seeds thoroughly on a paper towel or plate — this can take several days.
3. The key rule: seeds must be completely dry before storing
If they’re even slightly damp when you store them, they’ll go mouldy. So take your time and make sure they feel hard and dry to the touch before moving on.
How to Clean and Dry Your Seeds
Cleaning and drying is the stage where seed saving for beginners can go wrong. Here’s how to do it safely. Once you’ve collected your seeds, the next job is to clean and dry them properly. This step helps you avoid mould, rot, and pests — and gives your seeds the best chance of lasting until next season.
1. Cleaning seeds: remove the extras
Cleaning doesn’t need to be complicated — you’re just getting rid of any leftover bits of plant, fruit pulp, or fluff.
For dry seeds (beans, lettuce, peas, sunflowers):
- Rub them between your fingers or against a screen to separate seeds from husks or pods.
- Blow gently or use a sieve to help remove chaff (the light, dry plant material around the seeds).
- You don’t need them perfectly spotless — just clean enough to avoid mould or attracting insects.
For wet seeds (tomatoes, squashes, cucumbers):
- Rinse the seeds in a sieve under running water to remove pulp.
- For tomatoes and cucumbers, ferment them in a jar of water for 1–2 days — stir occasionally. The good seeds will sink; the rest will float.
- Pour off the bad seeds and gunk, rinse the good ones, and spread them out to dry.
2. Drying seeds: take your time
Dry seeds are safe seeds. Here’s how to do it right:
- Spread them out in a single layer on a plate, tray, or piece of paper towel. I once skipped stirring them and they stuck together in clumps. Now I always move them around once a day so they dry evenly.
- Keep them in a warm, dry spot out of direct sunlight.
- Label them right away (you think you’ll remember… you won’t).
- Stir or move them around once a day so they dry evenly.
- Drying usually takes a week or two depending on the seed size and humidity.
You’ll know they’re ready when they feel hard and brittle — not soft, squishy, or rubbery.
How to Store Seeds Properly
You’ve collected, cleaned, and dried your seeds – now it’s time to tuck them away safely until planting season. Proper storage is the key step in seed saving for beginners. Without it, even healthy seeds can lose viability.
1. Cool, dry, dark — that’s the golden rule
Seeds are dormant living things. To keep them alive (but inactive), they need to be kept somewhere:
- Cool – Ideally under 15°C. A cupboard on the north side of the house works well. Some people even store seeds in the fridge (just make sure they’re completely dry).
- Dry – Moisture is the biggest threat. If they get damp, they’ll mould or start sprouting.
- Dark – Light can trigger seeds to break dormancy or degrade them over time.
2. Use what you’ve got
You don’t need fancy containers. These all work well:
- Paper envelopes (easy to label and breathable)
- Glass jars or tins with a tight-fitting lid (add a silica sachet or dry rice for moisture control)
- Small zip-lock bags (keep them in a box or tin to block light)
Just avoid plastic containers unless you’re sure your seeds are bone dry — plastic can trap moisture and cause mould.
3. Label everything
You’ll think you’ll remember which seeds are which until spring rolls around and everything looks the same. Write down: Plant type, Variety name (if you know it), Date saved. I once forgot to label two envelopes of bean seeds and had no idea which was which. Now I even add a quick note like “best flavour” or “earliest crop” to remind myself later.
- Plant type
- Variety name (if you know it)
- Date saved
- Any other notes like “from best tomato plant” or “saved during heatwave”
A pencil or waterproof pen is your best friend here — ink can fade or smudge.
Labelling and Longevity Tips
You’ve done the hard part — now let’s make sure your seeds stay useful and you know what you’ve actually saved.
1. Labelling: don’t skip it
Seriously, label everything. Future-you will thank you. Even if you’re only saving a few seed types, once they’re dried and stored, they all start to look suspiciously alike.
What to include:
- Plant name – e.g. Tomato
- Variety (if known) – e.g. ‘Gardener’s Delight’
- Date collected – Month and year is enough
- Any extra notes – Like “best tasting one” or “early cropper”
You can write this straight onto paper envelopes or stick labels on jars or bags. Just use something permanent — pencil, ballpoint, or waterproof marker all work well.
2. How long do seeds last?
It depends on the plant and how well you store them. Here’s a quick guide:
| Plant | Seed Life (approx.) |
| Tomato | 4–6 years |
| Peas & Beans | 2–3 years |
| Lettuce | 3–6 years |
| Carrots & Parsnips | 1–2 years |
| Peppers | 2–4 years |
| Cucumbers | 5+ years |
Always do a germination test if you’re unsure: place 10 seeds between damp paper towels, keep them warm, and check after a week. If 7 or more sprout, you’re good to go.
3. Keep an eye on them over time
Every few months, do a quick check: is there any moisture in your containers? Are there signs of mould or bugs? If so, it’s best to toss those seeds and try again next season.
Seed Saving for Beginners: Mistakes to Avoid
Seed saving is straightforward once you get the hang of it, but there are a few common pitfalls that can trip up beginners. Avoid these, and you’ll save yourself a lot of frustration (and wasted growing time).
1. Saving seeds from hybrid plants
Hybrid (F1) seeds won’t grow true to type — meaning the plants that grow next year might not look or taste like the ones you saved them from. They could be weaker, less productive, or just plain odd. Stick with open-pollinated or heirloom varieties instead.
2. Storing seeds before they’re fully dry
This one catches a lot of people out. Even slightly damp seeds can go mouldy in storage. Make sure they’re totally dry — hard, brittle, and not at all squishy — before sealing them up.
3. Forgetting to label
You think you’ll remember. You won’t. Everything looks the same once it’s in a jar or envelope. A simple label saves confusion later — and helps you learn what worked (and what didn’t).
4. Letting seeds sit in wet fruit too long
For wet seeds like tomatoes or cucumbers, it’s tempting to scoop out the seeds and leave them in water for days. But if you leave them too long, they’ll start to rot. A short fermentation (1–2 days max) is all that’s needed.
5. Not checking for cross-pollination
Some plants (like squash or pumpkins) can cross-pollinate easily if you’ve got different varieties growing nearby. That means the seeds you save might grow into something completely different. This isn’t always bad — but it can be unpredictable.
6. Expecting perfection on your first go
You might save seeds that don’t germinate. Or forget to label something. That’s okay. Like gardening, seed saving is a skill you build over time. You don’t have to get it perfect to get started.
Closing Thoughts: It’s Simpler Than You Think
Seed saving might feel like a big step — but once you’ve done it once, you’ll wonder why you ever thought it was complicated. You don’t need a lab coat. You don’t need perfect technique. All you need is a little patience, some basic know-how, and the willingness to learn as you go.
And here’s the thing: every seed you save is a quiet little act of independence. It’s one less packet you need to buy. One more plant you’ve raised from start to finish. One more connection to the food you grow and the earth beneath your feet.
So start small. This guide to seed saving for beginners is designed to help you take the first step. I began with just one lettuce and one tomato variety. That was enough to give me confidence and a nice little seed stash for the next season. Pick one or two plants to save seeds from this year. Label them. Store them. And when spring comes around, plant them with pride — knowing you’ve closed the loop and opened the door to a more sustainable, empowered way of gardening.
You’ve got this. 🌱
Frequently Asked Questions (FAQ)
Alex is the creator of Homely Haven, a space dedicated to simple, stylish ideas for interiors and gardens alike. With a passion for cozy living rooms, inviting outdoor spaces, and practical DIY solutions, Alex shares tips and guides that help turn any house into a true home.
From budget-friendly decorating hacks to weekend garden projects, the goal is always the same: to inspire you to create spaces that feel personal, beautiful, and welcoming. When not writing, Alex is usually rearranging furniture, sketching new garden layouts, or exploring design trends for the next project.