Stop me if this sounds familiar: you open your pantry looking for pasta, and instead, you find a half-empty cereal box, a tipped-over bag of flour, and about seven cans of beans you forgot you even owned. Frustrating, right?
You’re not alone. Whether you’re a busy parent, a first-time home organiser, or just someone tired of the chaos, a messy pantry can make even the simplest meal feel stressful. The good news? You don’t need a huge budget or a massive walk-in pantry to fix it.
I’ve spent years helping people turn cluttered chaos into calm, and today, I’m giving you real, practical steps that will make your pantry look amazing and work better for your everyday life.
By the end of this guide, you’ll know exactly how to set up a pantry that looks straight out of a design magazine — without spending a fortune or losing your mind.
Start with a Clean Slate
Before you can create a pantry that’s both beautiful and functional, you need a fresh start — and that means clearing absolutely everything out. Yes, everything.
Take every item off the shelves and lay it all out where you can see it. You’ll probably be surprised by what you find hiding at the back. That bag of rice from 2017? It’s time to say goodbye.
Once the pantry’s empty, grab a cloth and give the shelves a proper wipe down. Crumbs, spills, sticky spots — get rid of it all. This is your blank canvas, and you want it to be clean before you start painting the masterpiece.
Pro Tip: If you want to go the extra mile, line your shelves with stylish contact paper or easy-to-clean liners. It adds a nice touch and protects your shelves from future messes.
Clearing everything out might feel like a hassle at first, but trust me — it’s the step that makes all the difference. You can’t organise chaos if you’re still clinging to it.
Group by Category
Now that you’re working with a clean slate, it’s time to bring some order to the madness. The easiest way? Group similar items together.
Think about how a grocery store is laid out: pasta with pasta, baking goods with baking goods, snacks with snacks. Your pantry should follow the same logic. It makes it quicker to find what you need, and it looks a hundred times more organised without much effort.
Here are a few basic groups you might want to use:
- Baking essentials: flour, sugar, baking powder, chocolate chips
- Canned goods: beans, tomatoes, soup
- Grains and pasta: rice, oats, spaghetti, quinoa
- Snacks: crisps, granola bars, biscuits
- Breakfast items: cereal, pancake mix, oats
- Condiments and sauces: oils, vinegars, jars of sauce
Don’t worry about making it perfect — you can always tweak things later as you use your pantry and figure out what works best for you.
Pro Tip: If you have duplicates, combine them. Three half-used bags of brown sugar can easily become one neatly sealed container.
This simple sorting step will set you up for a pantry that doesn’t just look nice — it actually works for your day-to-day life.
Decant for Beauty and Function
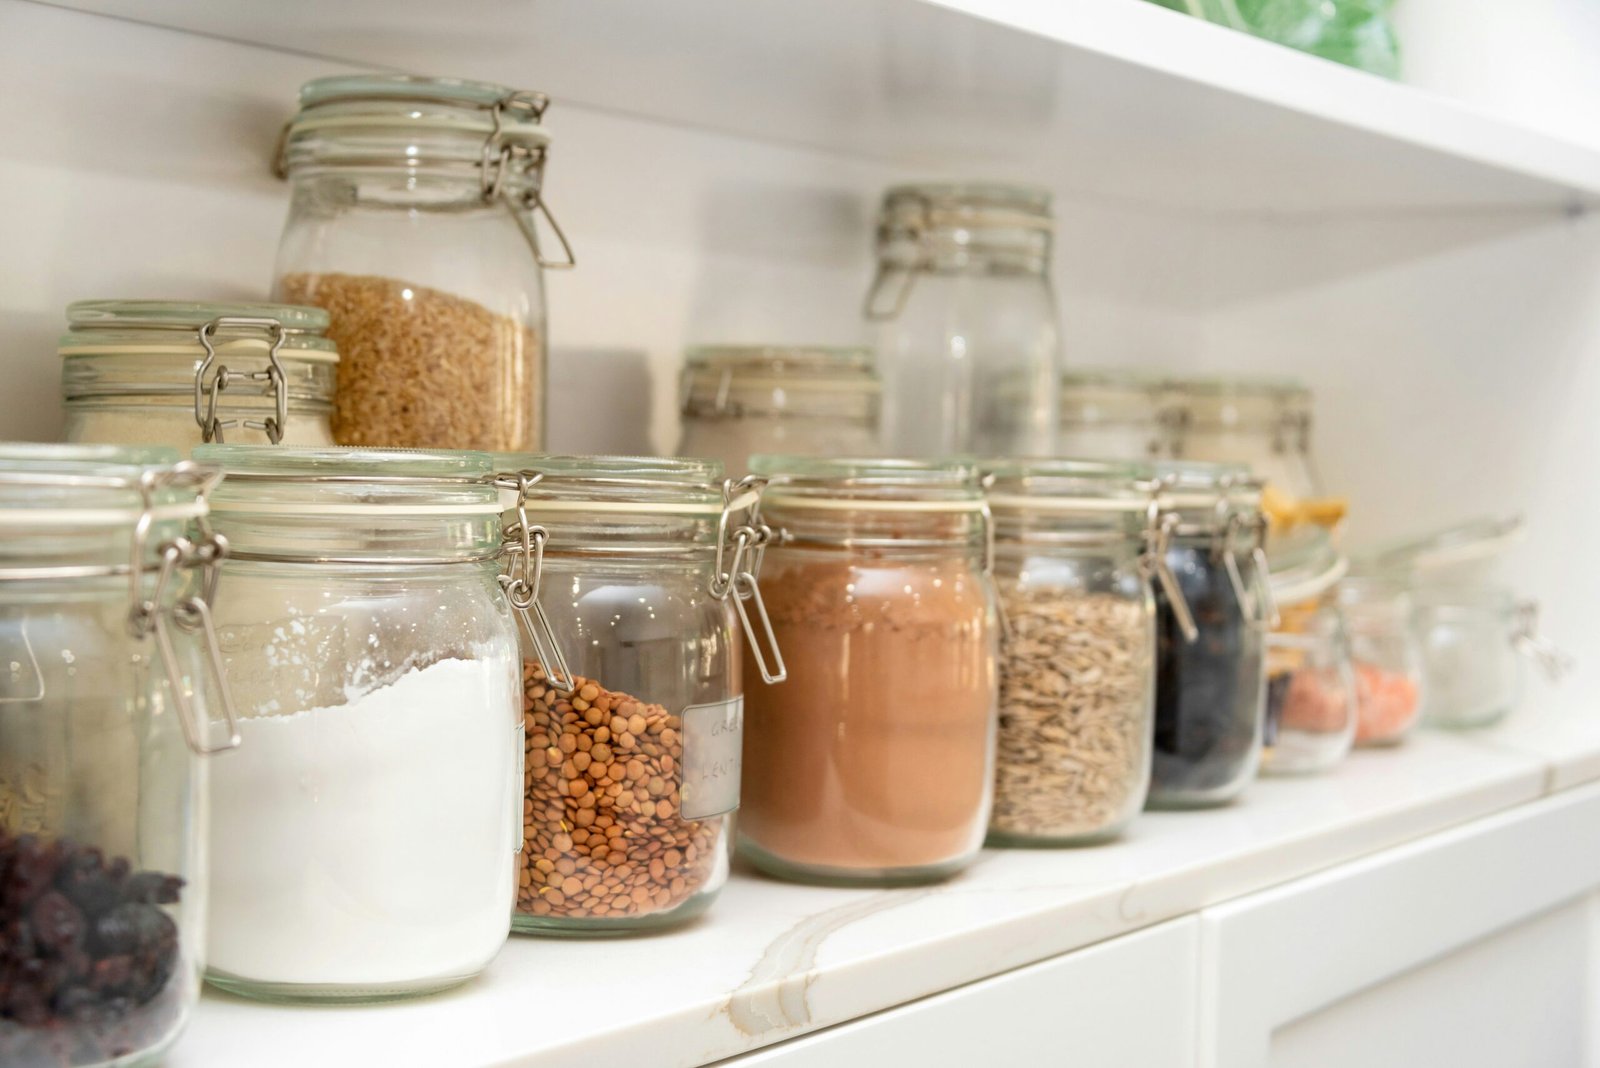
If you want your pantry to look seriously professional, decanting is your secret weapon.
Decanting simply means transferring food from its original packaging into clear, airtight containers. It’s not just about looking pretty (although, let’s be honest, it really does). It also keeps food fresher for longer, makes it easier to see what you have, and stops half-open bags from spilling everywhere.
Focus on these basics when you start:
- Dry goods: flour, sugar, pasta, rice, cereals, nuts, snacks.
- Baking supplies: cocoa powder, chocolate chips, baking soda.
Choose containers that suit your style and your space. Sleek glass jars work if you love a minimalist look. Chunky plastic bins are perfect for a busy family kitchen. Go with what you’ll actually use — there’s no point buying beautiful jars if they’ll drive you mad trying to clean them.
Pro Tip: Stick to one type of container (or at least a cohesive style) for a polished, pulled-together look. It makes a huge difference visually.
Decanting might feel like an extra step, but once you see your shelves lined with neat, matching jars, you’ll wonder how you ever lived without it.
Label Everything
Labels aren’t just a cute touch — they’re the glue that holds your organised pantry together.
Once you start decanting things into containers, it’s easy to forget what’s what. Is that plain flour or self-raising? White sugar or salt? Without labels, you’re setting yourself up for mix-ups and frustration later on.
The key here is to keep it simple:
- Use clear, easy-to-read labels.
- Stick them on the front or the lid, depending on how you store your containers.
- Include expiry dates if it makes sense (you can write it small on the bottom of the jar with a chalk marker or removable sticker).
There are loads of ways to label depending on your style. You can buy pre-made label sets, print your own, or even handwrite them for a more personal feel.
Pro Tip: Choose a consistent look for all your labels — same font, same style — to keep everything looking cohesive and polished.
Labelling isn’t just about aesthetics. It helps everyone in your house know where things belong, which makes it easier to keep your pantry organised long term.
Think Vertically and Use the Right Tools
Most pantries have one major flaw: wasted vertical space. If you’re only using the shelf itself, you’re missing out on half the storage potential.
Start thinking upwards. Add tools that help you stack and layer smartly:
- Shelf risers: Perfect for cans, jars, or spices — you can see everything without digging.
- Lazy Susans: Great for oils, sauces, or anything you usually knock over reaching to the back.
- Clear bins or baskets: Use them to group loose items like snacks or packets of seasoning.
- Over-the-door racks: Ideal if you’re short on shelf space but have a door begging to be useful.
The right tools turn a basic pantry into a super-efficient one. And no, they don’t have to be expensive. You can find loads of affordable options at stores like IKEA, Kmart, or even online.
Pro Tip: Measure your shelves before you shop. There’s nothing worse than buying the perfect bin only to realise it doesn’t fit.
By using the full height and depth of your pantry wisely, you’ll make the most of every inch — and it’ll look way more high-end too.
Make It Work for Real Life
An organised pantry isn’t much good if it only stays pretty for a week. The trick is setting it up in a way that fits your daily habits, not someone else’s Instagram feed.
Here’s how to make sure your pantry works for your life:
- Put everyday items at eye level: Whatever you reach for the most (snacks, breakfast foods, coffee supplies) should be easy to grab.
- Use zones: Dedicate different shelves or sections to different categories — baking zone, snack zone, dinner essentials zone.
- Kid-friendly access: If you’ve got little ones, keep healthy snacks where they can reach them (and maybe hide the treats a bit higher up).
- Quick drop zones: Have one or two baskets for the “messy” stuff — opened packets, half-used bits — so you can toss them in without destroying your whole system.
Pro Tip: Don’t overcomplicate it. If you have to think too hard about where something goes, you’ll stop doing it — and so will everyone else in your house.
Real life is messy sometimes, but a smart pantry makes it easy to do a five-minute tidy-up instead of a full-blown overhaul.
Aesthetic Touches
Once the basics are sorted, this is where you get to have some fun. Adding a few aesthetic touches will make your pantry feel less like a cupboard and more like a curated space you actually want to open.
Here’s how to level it up:
- Stick to a colour scheme: Neutral tones like white, glass, wood, or black always look clean and timeless.
- Mix textures: Combine clear containers with woven baskets or wooden crates for a more layered, designer feel.
- Use stylish decanters: Things like olive oil, vinegar, and syrups can be poured into matching glass bottles for that extra polished look.
- Add small decorative elements: A simple framed quote, a small plant, or a patterned shelf liner can add personality without cluttering the space.
Pro Tip: Less is more. You want it to look styled but not crowded — clean lines and consistency are what give it that ‘pro’ look.
Adding these finishing details turns an organised pantry into a statement feature in your home — and you’ll feel a little spark of joy every time you open those doors.
Final Tips to Keep It Up
You’ve put in the hard work — now it’s about making sure your pantry stays as gorgeous and organised as it is today.
Here’s how to keep it looking (and working) like a pro:
- Do quick weekly resets: Spend five minutes once a week putting things back in their zones and tossing anything expired or empty.
- Stick to your system: Resist the urge to shove random items wherever they fit. A home for everything keeps chaos away.
- Reassess every few months: Life changes — new foods, new routines, new family members. Give yourself permission to tweak your setup when you need to.
- Keep extras elsewhere: If you bulk buy, store extras in a separate space like a garage shelf or utility cupboard. Keep your pantry for the everyday essentials.
Pro Tip: A tiny bit of maintenance here and there will save you from having to do another giant reorganisation down the line.
Organising your pantry isn’t just a one-off project — it’s setting up a system that works with your real life, for the long haul.
Alex is the creator of Homely Haven, a space dedicated to simple, stylish ideas for interiors and gardens alike. With a passion for cozy living rooms, inviting outdoor spaces, and practical DIY solutions, Alex shares tips and guides that help turn any house into a true home.
From budget-friendly decorating hacks to weekend garden projects, the goal is always the same: to inspire you to create spaces that feel personal, beautiful, and welcoming. When not writing, Alex is usually rearranging furniture, sketching new garden layouts, or exploring design trends for the next project.